Every autumn you’ll find me dehydrating tomatoes, not wanting to lose a single fruit! Here’s my step by step guide on getting the most of your homegrown tomato crop.
Although the end of the season is now in sight, I’m still picking a tonne of tomatoes every day. The majority have been frozen in one of our giant (Dexter style) chest freezers, but as they are filling with the rest of Autumn’s bounty, it’s time to finish preserving our crop in a more lightweight, storage-friendly manner.
How to Prepare Tomatoes for Dehydrating
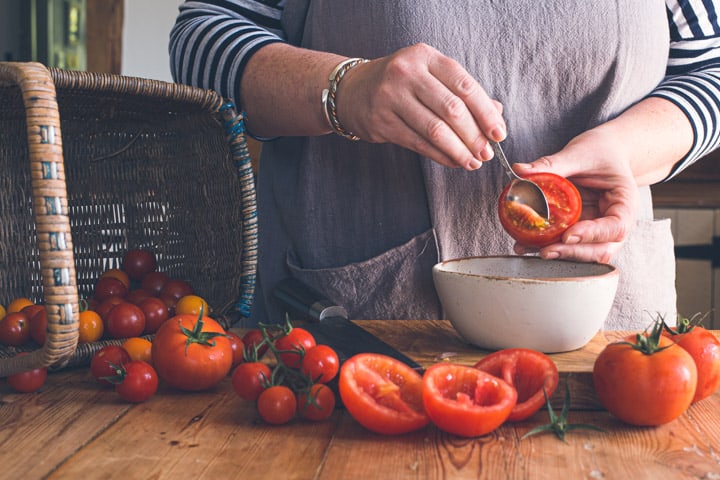
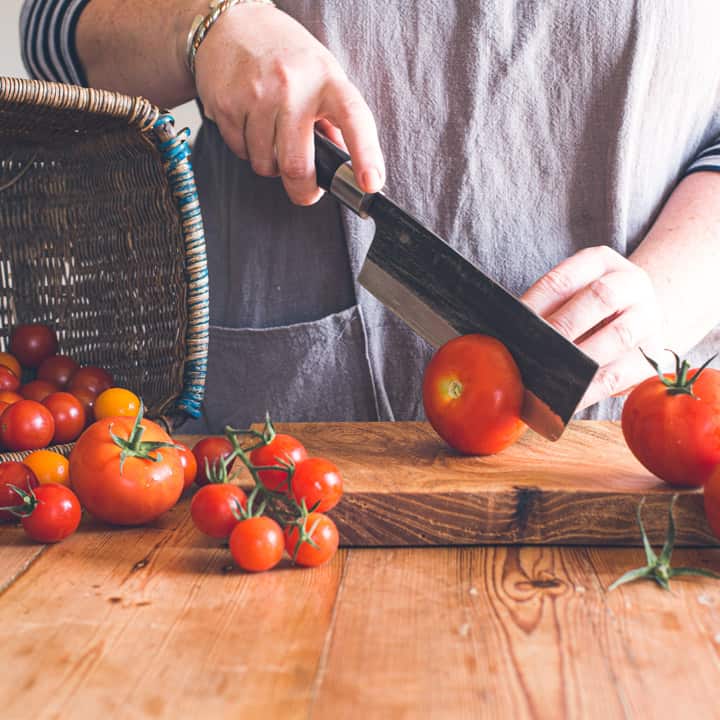
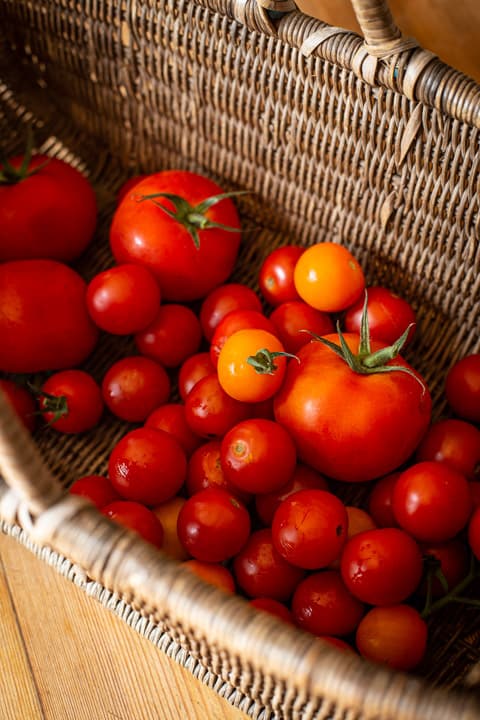
Pick or buy very ripe tomatoes that are still firm. It doesn’t matter if they’re split, so long as it’s a wet, fresh split and no chance of any mould being present.
Wash if necessary, then wipe with a dry cloth.
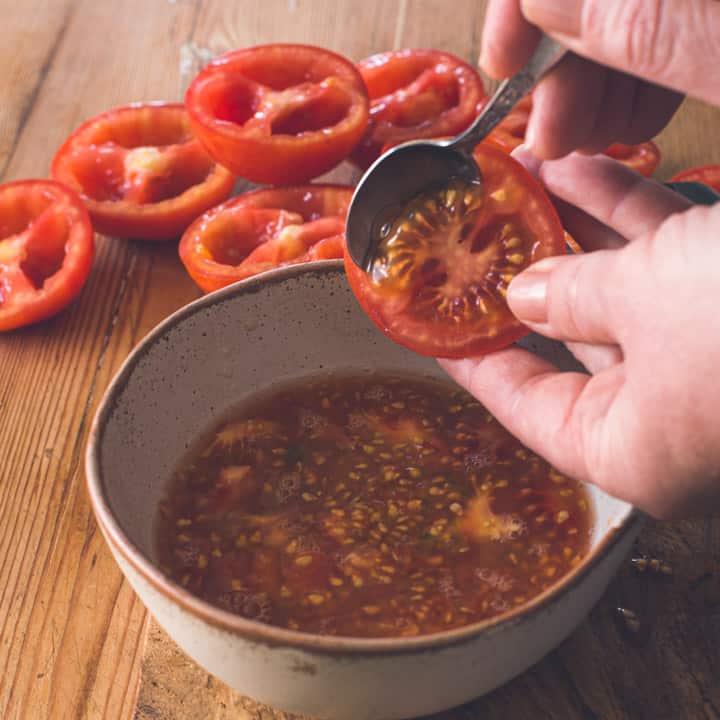
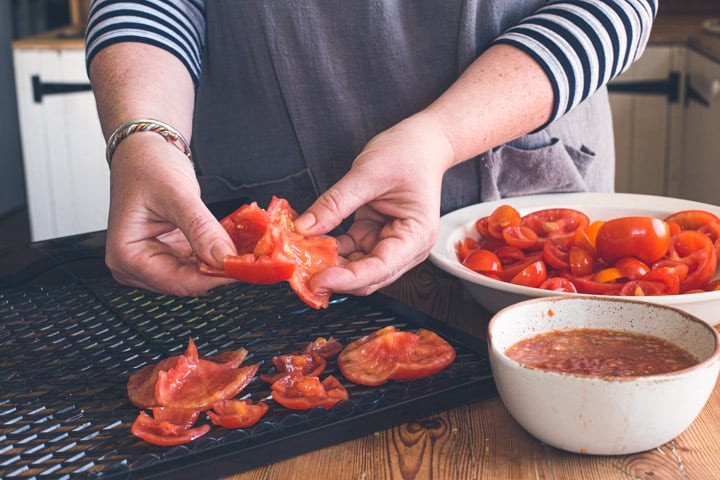
Cut in half and scoop the seeds and juice out.
You can leave the seeds in if you prefer, but they will take much longer to dry out.
I feed them to my hens (they LOVE them!), but you can compost them or add them to a stockpot, soup or stew if you’d rather consume them.
Some people dehydrate the seeds, and any peels if they are skinning their tomatoes first. They then grind them up to make a concentrated tomato powder that can be used as a seasoning.
You would need a lot of seeds/skins to make the effort worthwhile I would think. But if you give it a go, please let me know how you get on :)
Then your tomato halves are ready for drying…
How to Dry Tomatoes in the Oven
If you don’t own a dehydrator, you can still dehydrate tomatoes using your oven. I’ve never personally tried it, but the principles are the same.
Please note that it will likely be far more expensive to run your whole oven for the several hours required to get your fruits completely dry. Dehydrators are designed to run for long periods of time with very little running cost.
Simply switch the oven on to its lowest setting. Then you need to keep the door cracked open for the moisture to escape. To do this, try wedging the door slightly ajar with a wooden spoon.
Place your tomatoes on the bottom shelf on a wire cooling rack or oven shelf, so that the air can circulate completely around the fruit. You will need to leave the oven on at least overnight, but it may well take much longer depending on your oven.
How to Dry Tomatoes in a Dehydrator
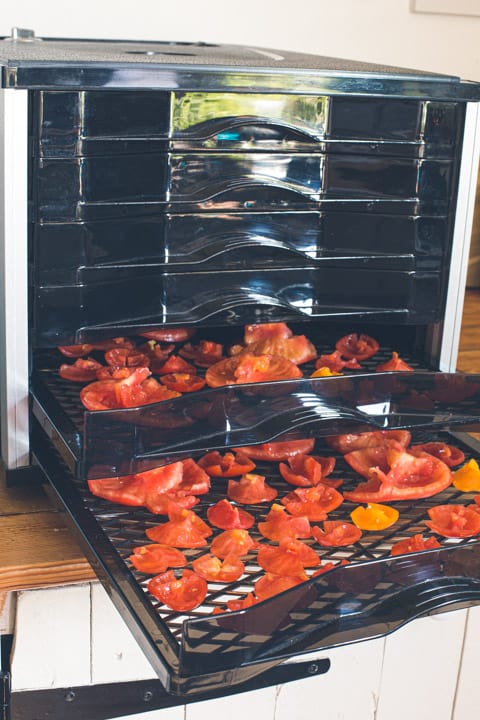
Your other option is to buy a dehydrator to do the job for you. You can dry all manner of fruit, veg and even meat (think Jerky & Biltong) in them, and although you can get some super-duper expensive models, they don’t all cost the earth.
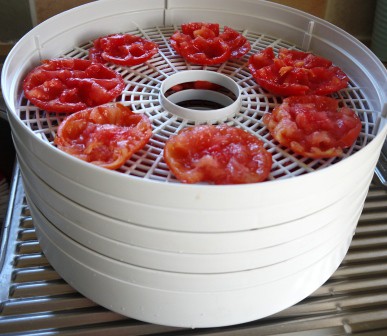
Load the tomatoes up on the dehydrator shelves. Be sure to leave ample room around each tomato for the air to circulate fully. This is definitely a time for the less is more adage.
I also like to squash any large ones flat to increase the surface area allowing the fruit dry that much quicker.
You can also slice your tomatoes if you prefer. Ensure each slice is similar in thickness so that they dry at the same rate.
Set the dehydrator temperature to between 50° – 60°C (122°-140°F). In my experience, they will need at least 8 hours, so I tend to run my machine overnight.
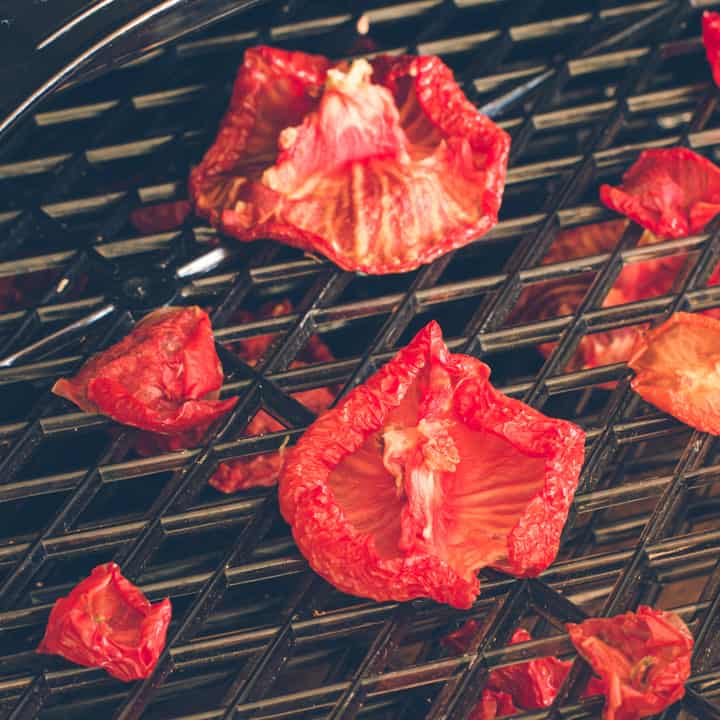
When dried, they will feel pliable & leathery, rather than crispy.
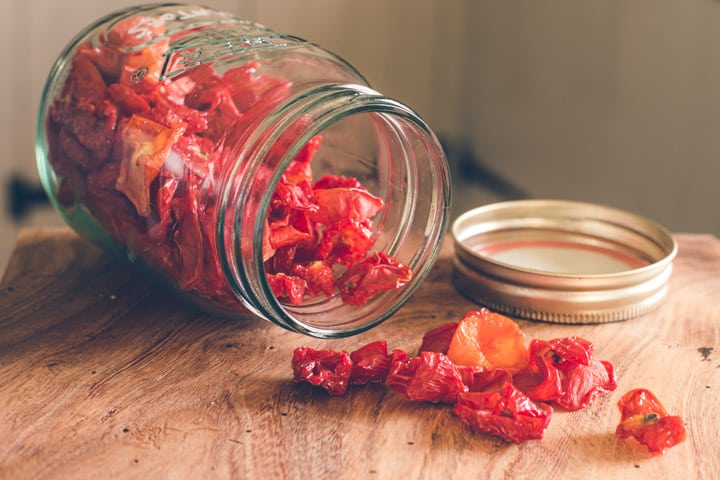
Switch off the machine and leave for 20-30 minutes, or until the fruit has fully cooled. Packing dried food away warm will cause them to sweat, thereby introducing moisture to the mix, which will lead to mould.
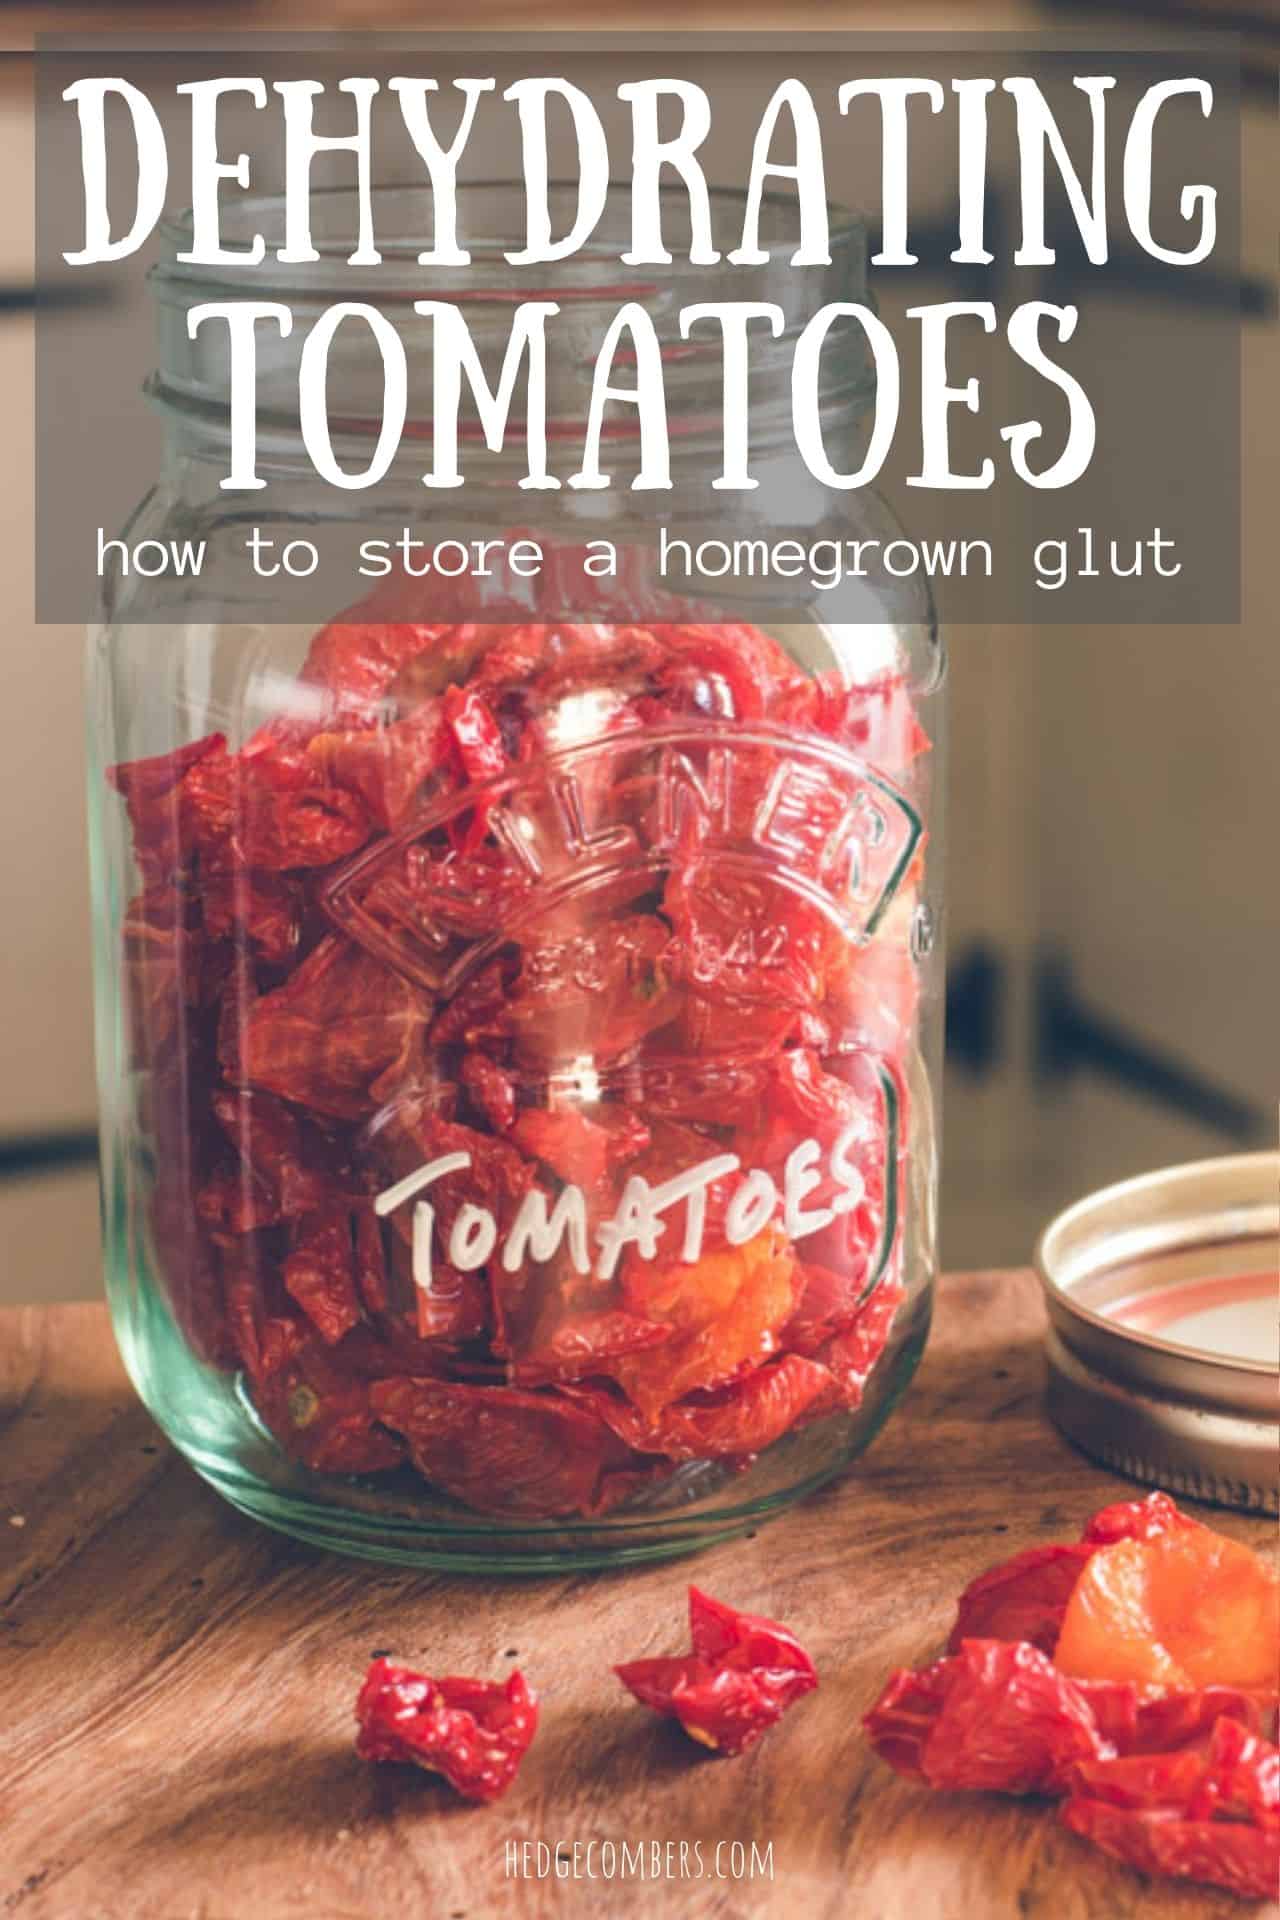
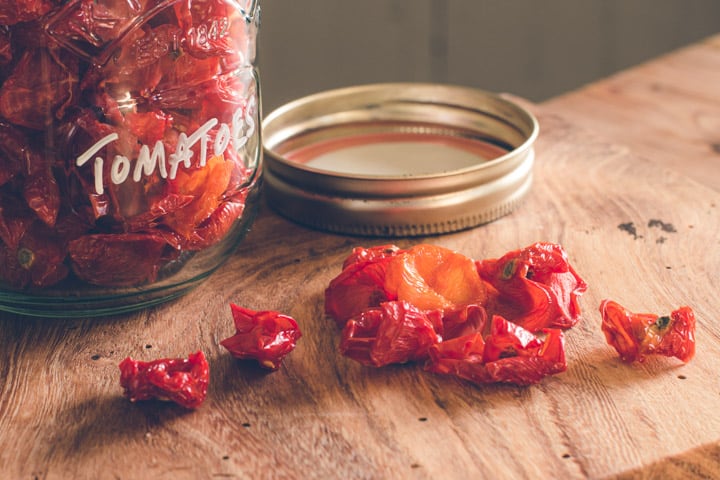
Once totally cooled, pop into a sterile and airtight jar, tub or bag. You are ‘supposed’ to use them within 3 months of drying, although I happily use them all year round with no side effects to taste or health.
How to Store Dehydrated Tomatoes
Once you’ve gone to all the trouble of drying your tomatoes, if you just then leave them out on the counter, they will absorb moisture from the air and slowly go bad.
To preserve them you can store them in something airtight. This may be a glass canning jar, a clip lock plastic food tub or even a good quality Ziploc bag.
Store these jars/tubs/bags out of direct sunlight, somewhere cool and dry. I happily store mine for up to a year this way. However, if you want to maximise the nutrients in your stash, you can also freeze the tomatoes once they are dried. This will extend their shelf life indefinitely.
If you wanted to make sundried(ish) tomatoes, you need to stop the drying process a little earlier. The tomatoes need to have a little more moisture in them, so they are soft rather than leathery. Then place in a sterile jar, top up with oil, and make sure to cover the fruit completely. Run a knife around the inside of the jar to dislodge any air pockets (air = a risk of spoiling).
Pop on a lid and store in the fridge. This method does involve a slight risk of mould and/or botulism. If you are concerned at all, please stick to drying your tomatoes fully and storing them in an airtight container.
How to Use Dehydrated Tomatoes
- Chop up and scatter on salads and savoury dishes for a flavourful tomato boost all year round.
- Rehydrate a little in hot water/salad dressing and add to sandwiches.
- Add to ‘wet’ dishes like curry and stews where they will fully rehydrate during the cooking time.
- Eat straight from the jar as snacks (SO good!)
- Chop up and add to muffin, bread or cracker recipes for extra flavour.
- Rehydrate with a little hot water/stock to make a rich pasta or pizza sauce.
- Make a ‘tomato powder’ to add to any dish to boost flavour and nutrition. Extend the drying time until the fruits are crispy. Let cool, then run through a food processor/blender until you have a tomato powder. Store in an airtight bag/jar.
Do you have a favourite way to use dried tomatoes? Please, let us know below!
Which Dehydrator Do I Recommend?
For many years, I used a very cheap unit called the Westfalia Food Dehydrator. It was priced around £35 and it was a great introduction to drying my own foods. It also proved that a dehydrator was a tool I would get a lot of use out of!
Edited to add: the above dehydrator is no longer in stock, but you can find plenty of similarly priced dehydrators on Amazon (affiliate link).
After some years of using it, and since moving over to my newer dehydrator (see below), I have 2 main faults with it that I’d like you to bear in mind if you’re in the market for a dehydrator.
- The shape. Being round meant it took up as much cupboard space as a square one, but only held a fraction of the food.
- It had no temperature gauge. Being able to select the correct temp for the food you’re drying is imperative if you want to preserve nutrients in your food.
Nowadays however, we’re using the Optimum P200 Dehydrator (affiliate link). It’s a great machine that takes a lot of abuse, and we’ve never had any problems with.
It’s big and boxy, but I much prefer that to the round style dehydrator that we used to have as it’s much more space-efficient.
The thing is, when I want to dehydrate something, it’s usually because I have a glut. A small dehydrator was a great intro into the world of drying, but I outgrew it really quickly.
The Optimum P200 dehydrator has a temperature range between 35°C and 68°C. The lowest temperatures are useful for drying herbs and delicate foods. Whilst the higher temps are perfect for drying meat, fish and making jerky.
I hope you found that info useful, and do leave any questions you may have below. Here’s all my food dehydrating posts if you’d like more inspiration in the world of dehydrators and drying food for storage.
Jane x
Please note, this article contains affiliate links. Thank you for supporting the work that we do here at The Hedgecombers.
Allison says
Just about to persuade the hubbie to get a dehydrator thanks to the link, and looking forward to trying your fab recipes x
HedgeComber says
Allison, that’s brilliant news! You’re going to LOVE it, I promise you :) Do let me know what your favourites are to dry x
Janie x
Andrew says
Dehydrator ordered via the link. Here’s hoping for a glut of fruit in 2015.
Many thanks
Jane Sarchet says
Cool! I hope you get lots and lots of use out of it Andrew, and here’s to that bumper crop :)
Janie x
Choclette says
Ooh, you’ve got me all excited about dehydrating again. Ours is hidden in the garage somewhere as we’ve nowhere to put it in the house, but I’m keen to drag it out at some point and get dehydrating. Never tried tomatoes, but we have a glut right now, so maybe time to turn my meaningfulness into reality. Fab photos, as always.
Lois Luckovich says
I MADE 3 GALLON JARS OF DEHYDRATED TOMATOES ONE YEAR AND MY FRIEND’S SON CLAIMED THEY TASTED LIKE KETCHUP POTATO CHIPS. He LOVED THEM AND THE VERY NEXT TIME THEY CAME TO VISIT HE ASKED FOR MORE TO MUNCH ON WHILE HIS MUM & I VISITED
Jane Sarchet says
Haha, I love this Lois! Thanks for sharing :)
Jane x