This BBQ Baked Camembert cheese is a real treat that you need at your next cook out. Silky, creamy Camembert, woody aromatic rosemary and the subtle crunch of walnut chunks. This is delicious :)
This recipe was originally published in 2018
Baked camembert is one of those dishes that as soon as you’ve you’ve tasted it for the first time, you’re already planning when you can make it again!

How to make Baked Camembert
Originally, I wrote this recipe purely for baking a whole camembert on the BBQ when camping.
But we enjoyed it so much that we soon adapted it to be cooked in the oven too!
Both methods are covered fully in the recipe below.
But here’s my top 9 tips to getting it perfect, however you choose to cook it…
Baking Le Rustique Camembert
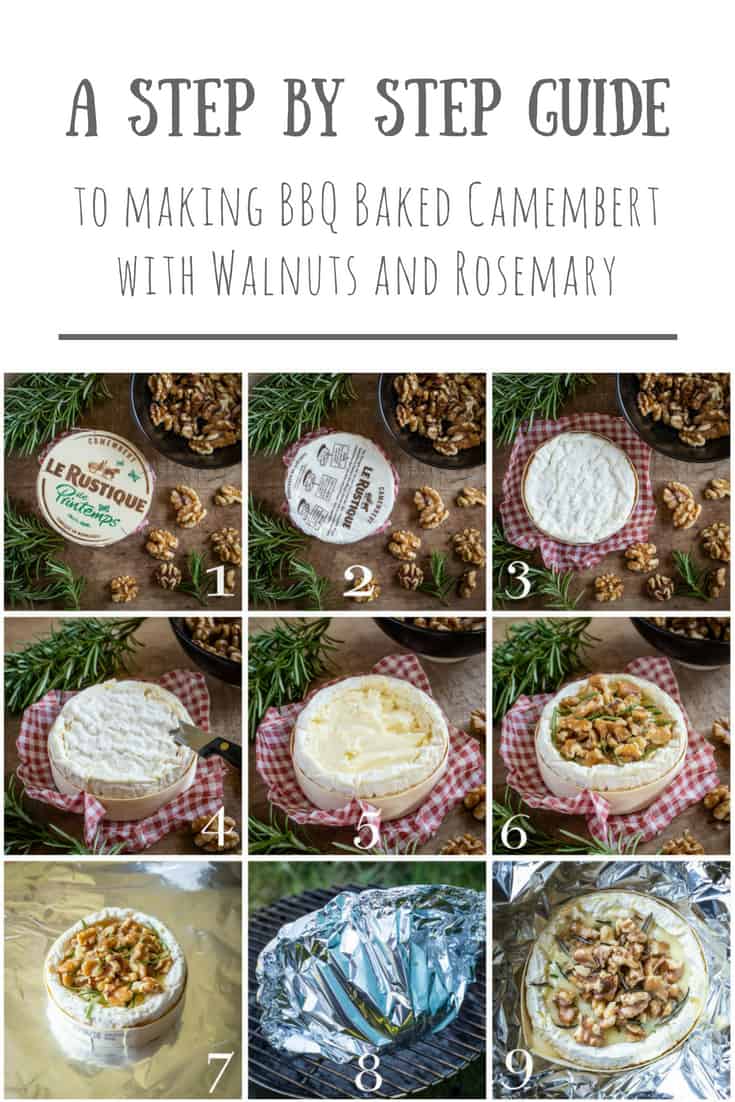
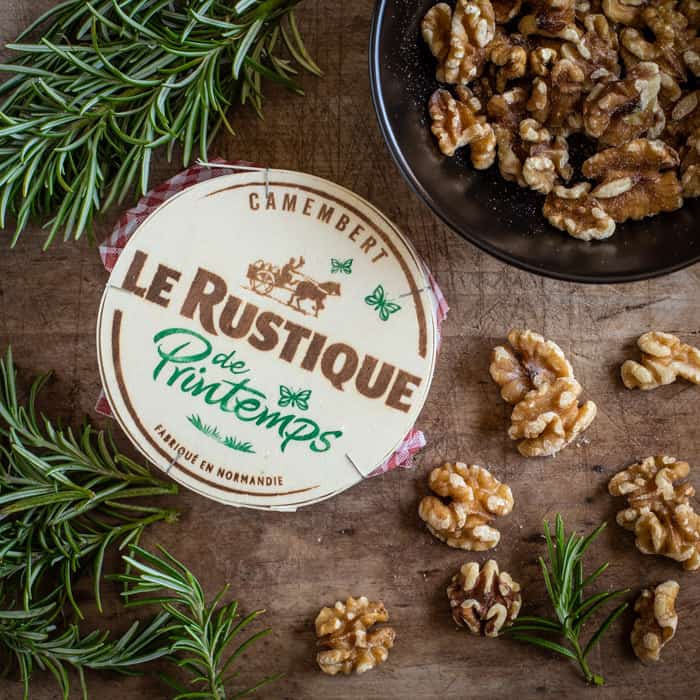
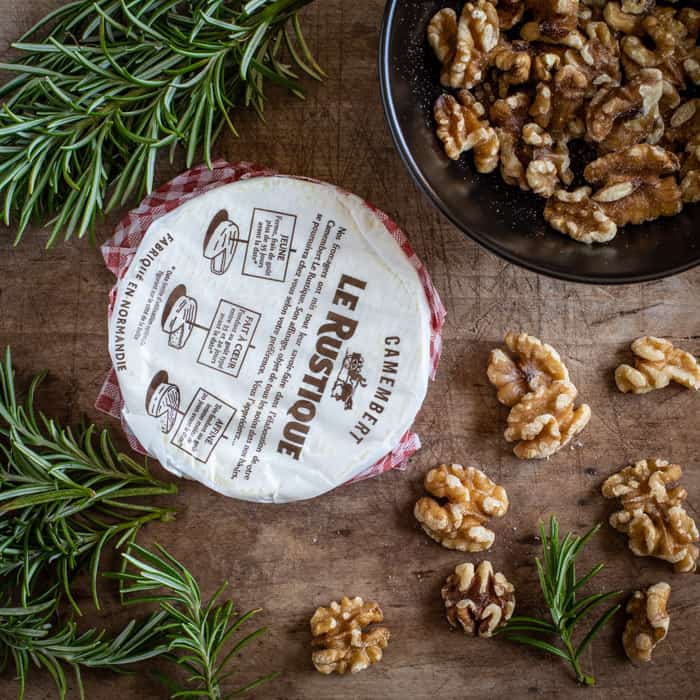
1/ Ensure your Camembert comes in a wooden box and not anything that could melt or become toxic on the BBQ.
I’m using Le Rustique camembert which comes in a traditional round plywood tub.
It’s easily available here in the UK in most major supermarkets.
But you could of course use any brand of camembert that comes in a wooden tub.
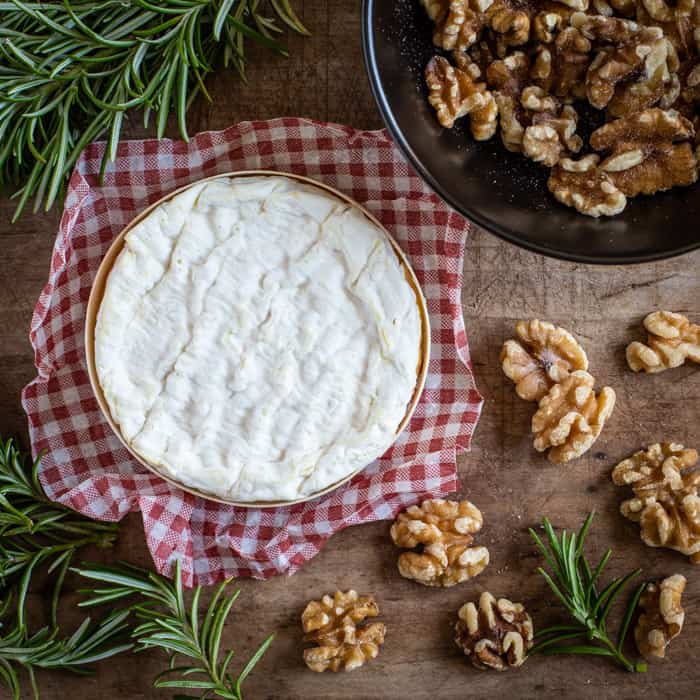
2/ Remove all the packaging from inside the wooden tub.
Inside the ply box of the Le Rustique cheese, you’ll find that the actual cheese is wrapped in a plastic coated baking paper.
You’ll need to unwrap the cheese from this and dispose of it.
3/ Pop the naked cheese back in the box.
Since taking these photos I’ve since learnt to nest the bottom of the wooden tub inside the upturned lid.
This gives the whole thing more structure, and prevents that incredible oozy spread you’ll see in the picture below.
(although I’ll be honest, I did love scooping up that oozy goo!)
4/ Cut a ‘lid’ out of the top of the cheese.
Use a small, sharp knife to cut a few millimetres underneath the ‘skin’ of the cheese.
Be sure not to cut all the way through to the base.
And be sure to not pierce the ply wood tub.
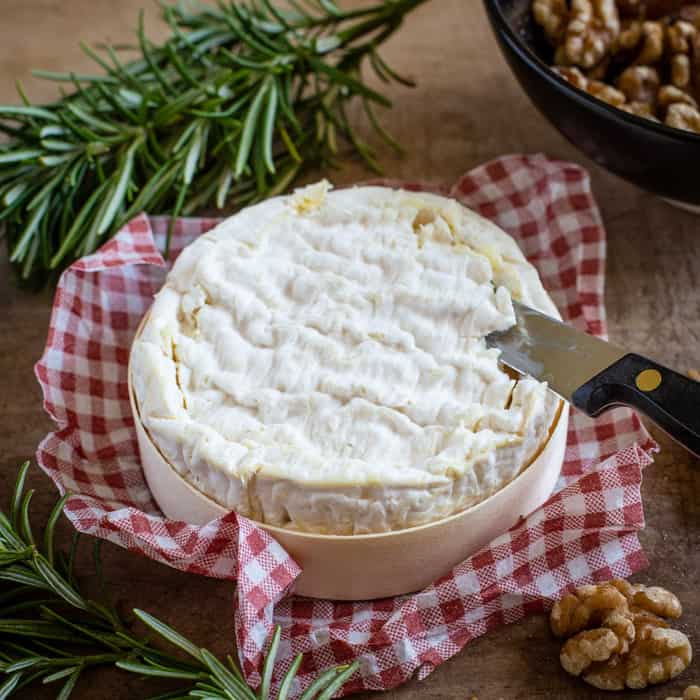
5/ Remove the ‘lid’ of the camembert.
This can be done by carefully sliding your knife under the ‘lid’,
Then it will simply lift it off, leaving the silky interior exposed.

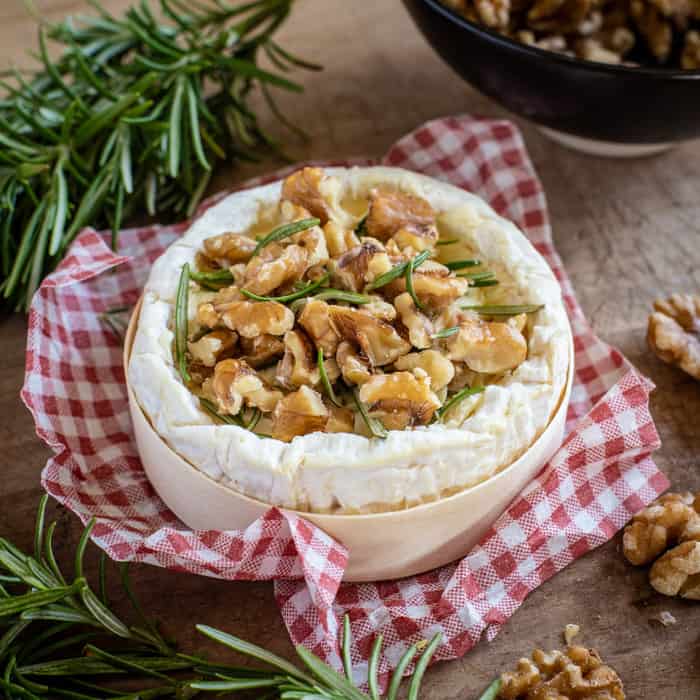
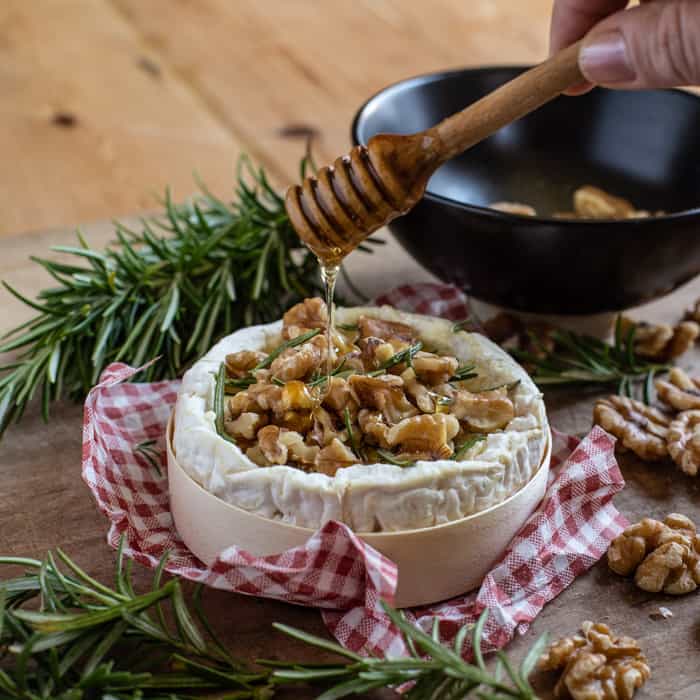
6/ Flavour your cheese.
I scattered mine with rosemary and walnuts.
And then drizzled a little honey over.
The honey is optional but comes highly recommended!
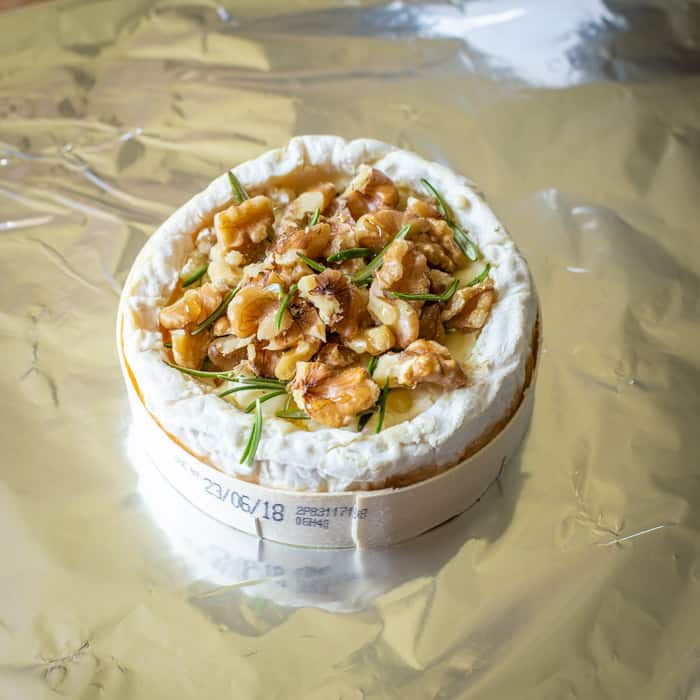
7/ Wrap the tub in foil.
Place a double layer of foil on your kitchen counter.
Place the tub of flavoured cheese in the centre.
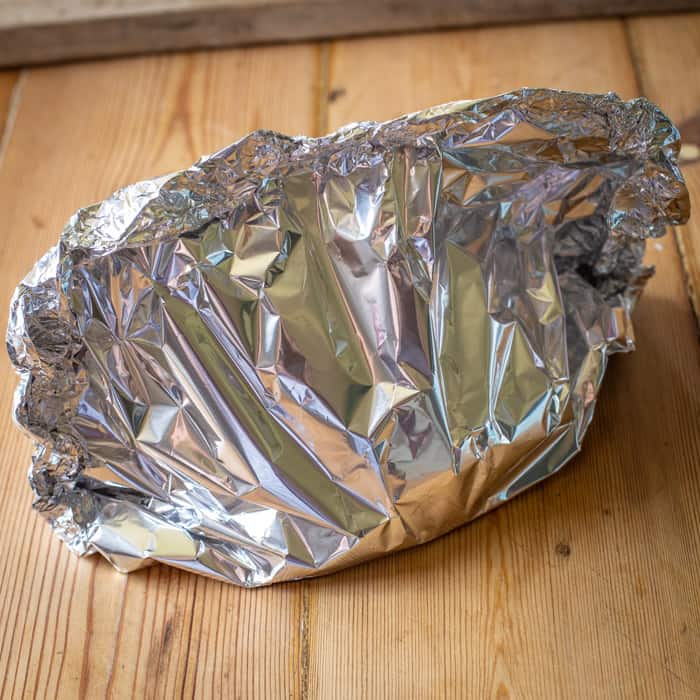
Then fold up the sides and crimp the edges together to create a little tent around the cheese.
If the foil touches the cheese as it cooks it will stick a little, but it’s not the end of the world.
8/ It’s time to cook your camembert cheese!
Place the foil tent on the preheated BBQ (or in the preheated oven – see below).
Cover the BBQ with the lid.
And let bake for 25 minutes, or until the cheese is a pool of yummy decadence.
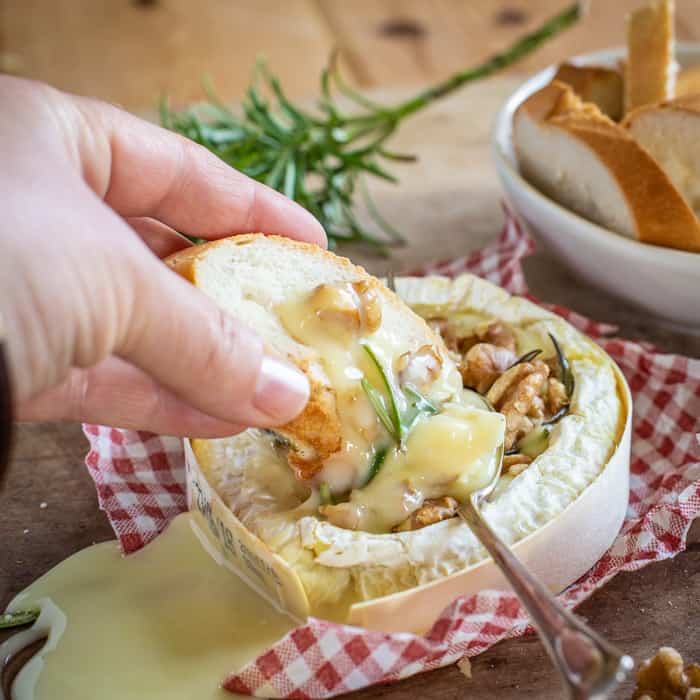
9/ Carefully unwrap the foil
Watch out for steam that may have built up in there, and dig in with gusto!

How to Serve Cooked Camembert
Once cooked, camembert becomes silky and oozy. And in my mind, it’s best served as simply as possible.
Maybe serve alongside some fresh baguette, or some crunchy crackers or oatcakes.
It’s rich and decadent and the most perfect comfort food for a cheese lover!
Camembert Facts
Whilst researching this post, I learnt that you have a little bit of control over the final taste of the cheese you cook.
This is all down to how young or mature the cheese is when you cook it.
Take a look at the ‘best before’ date on your cheese. Camemebert continues to age in your fridge, so the closer to the best before date, the stronger in flavour it will be.
Don’t worry, Camembert isn’t classed as a very strong tasting cheese.
But you may find that you prefer leaving it until it’s classed as mature, as it will pack some extra flavour.
Mature Camembert
If you like your Camembert soft, creamy and with a flavour punch, leave it mature close to the use by date on the pack (20 days or less is considered a mature Camembert).
Ripe Camembert
If, however, you prefer a milder flavour with a firmer bite. Aim to consume the cheese 35 days or more before the use by date.
Young Camembert
If you want to please more than one palate, aim to serve the cheese between 20 and 35 days before the use by date.
The flavour will be distinctive, but soft enough to melt in the mouth.
Mmmmmm. Please do let me know if you try this classic baked camembert dish!
And feel free to tag me in any photos you share online. You can find me pretty much everywhere as @hedgecomber.
And if you’d like some more campfire or BBQ side dishes, check out my ever popular How to make Hummus without a Blender post. It’s the perfect healthy camping dip!

- 250 g Camembert cheese - in a wooden box
- 30 g walnuts
- 1 sprig rosemary - leaves stripped from stem
- 2 tsp honey - (optional, but delicious!)
Remove all the packaging from inside the wooden tub and pop the naked cheese back in the box.
Using a small, sharp knife, cut a 'lid' out of the top of the cheese.
Be sure not to cut all the way through to the base or through the plywood.
Slide the knife under the 'lid' to remove it.
Scatter the cheese with rosemary and walnuts, and drizzle a little honey over.
The honey is optional but comes highly recommended!
Place the wooden tub on a double sheet of aluminium foil.
Fold up the sides, then crimp the edges together to create a little tent around the cheese.
Place the foil tent on the preheated BBQ.
Cover with the lid, and let bake for 25 minutes or until the cheese has fully melted.
Carefully unwrap the foil (watch out for steam that may have built up in there) and dig in with gusto!
Preheat the oven to 180°C /350°F/gas 4.
Place the wooden tub of cheese onto a baking tray, or pie dish.
Place in the oven and cook for 12-15 minutes, or until the cheese is molten and begging to be eaten!
If you’d like to find more inspiration for camping recipes, do check out my other recipes!
Jane x
Kate - Gluten Free Alchemist says
Oh wow! This looks amazing Janie. That BBQ will be out as soon as we get a sunny weekend x
All That I'm Eating says
This is a great idea! Never thought about putting Camembert on the BBQ. What a great way to start or finish a meal.
Jane Sarchet says
So, so tasty!
Jane x