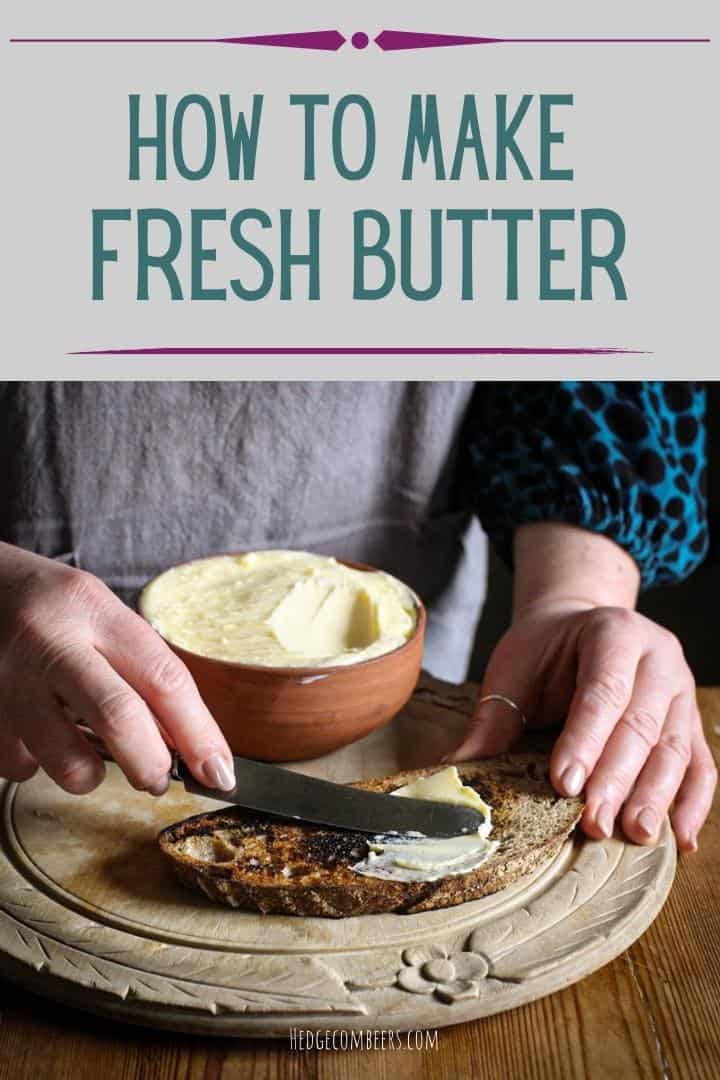
If you’ve ever wondered how to make butter, I’m so happy to walk you through the easy and very satisfying process.
And I’ll show you a few different ways of making it too. From using a stand mixer, hand mixer, old fashioned butter churn and even how to shake butter in a jam jar!
Butter is the one item that is always on my weekly shopping list.
I always have a couple of spare packs in the fridge. And I’ve even got a few blocks in the freezer too! (Yes, butter freezes and defrosts perfectly! There’s no change to texture or flavour.)
So I decided to learn how to make it myself, from scratch, and share the outcome with you. Making homemade butter should be on every cooks kitchen bucket list!
But before we actually make our fresh butter, we need to start with the cream…
What cream do I need to use to make butter?
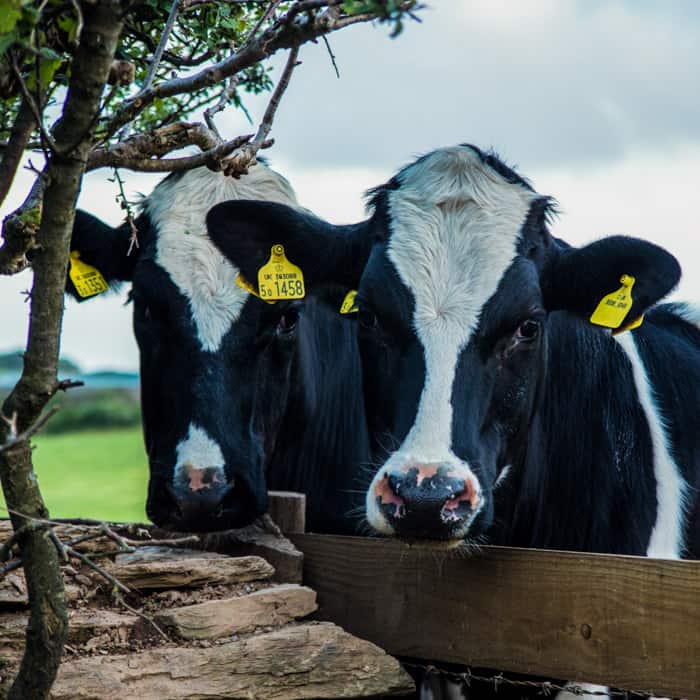
Cows milk is made up of cream and milk, a fatty component and a watery component. The % of both depends on many factors including the breed of cow, season of the year, the foods the cow eats etc.
As butter is made by removing all the watery parts from the cream, ideally we want to start with the heaviest, thickest pure cream possible.
What type of cream should I buy to make butter?
Here in England, that means Double Cream. Double cream has 48% fat and makes a rich, high quality butter.
(Clotted cream, whilst being even thicker than double cream won’t work as it’s baked, not a raw (or pasteurised) cream).
In the US I believe Heavy Whipping Cream (or heavy cream) has the highest proportion of fat at over 40% fat, and this works well.
What ingredients should I look out for?
Also, you need to look for just cows milk on the ingredients label.
Any preservatives or additives used may prevent the butter from forming.
Pasteurisation is fine though. Which is handy as all supermarket cream here in England in pasteurised!
Can I use fresh, raw cream to make butter?
Yes! And if you have access to raw cows milk, lucky you!
Simply let the milk settle overnight in the fridge, then scoop off the cream from the top of the milk and use that.
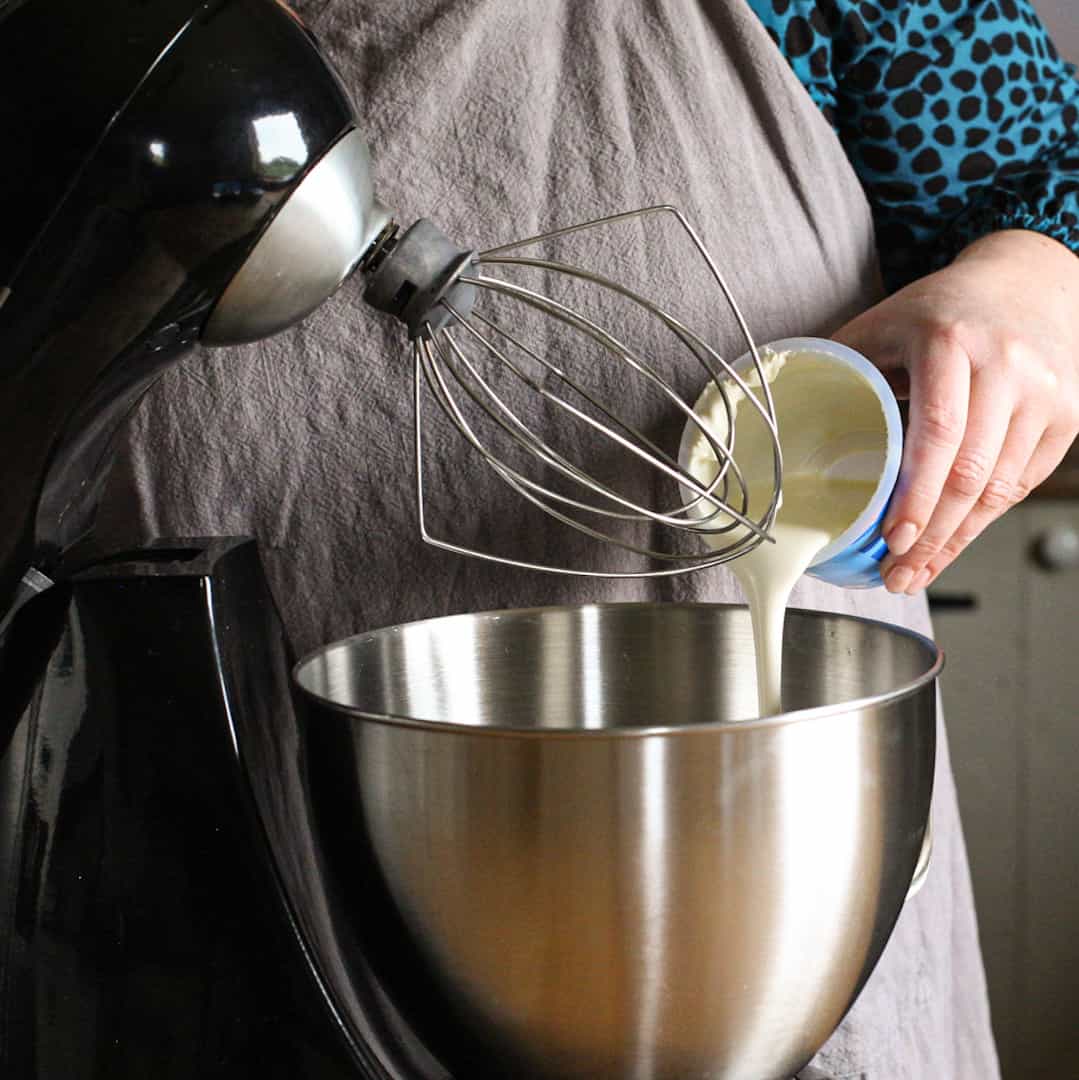
How to make butter with a stand mixer
This was the easiest method I tried, so let’s start here.
You’ll find info on all the other methods I mentioned below.
1/ whip the cream
To ensure a good shelf (fridge!) life, make sure all your equipment is sparkling clean.
Pour the cream into the mixer bowl.
Using the whisk attachment, set it to whisk.
It’s going to take a while, so now’s a good time to put the kettle on!
When I got to the regular whipped cream stage, I decided to swap over my whisk attachment for the dough hook.
This bit is definitely not essential, but it will make it so much easier to release the butter a bit later.
2/ scrape down the sides
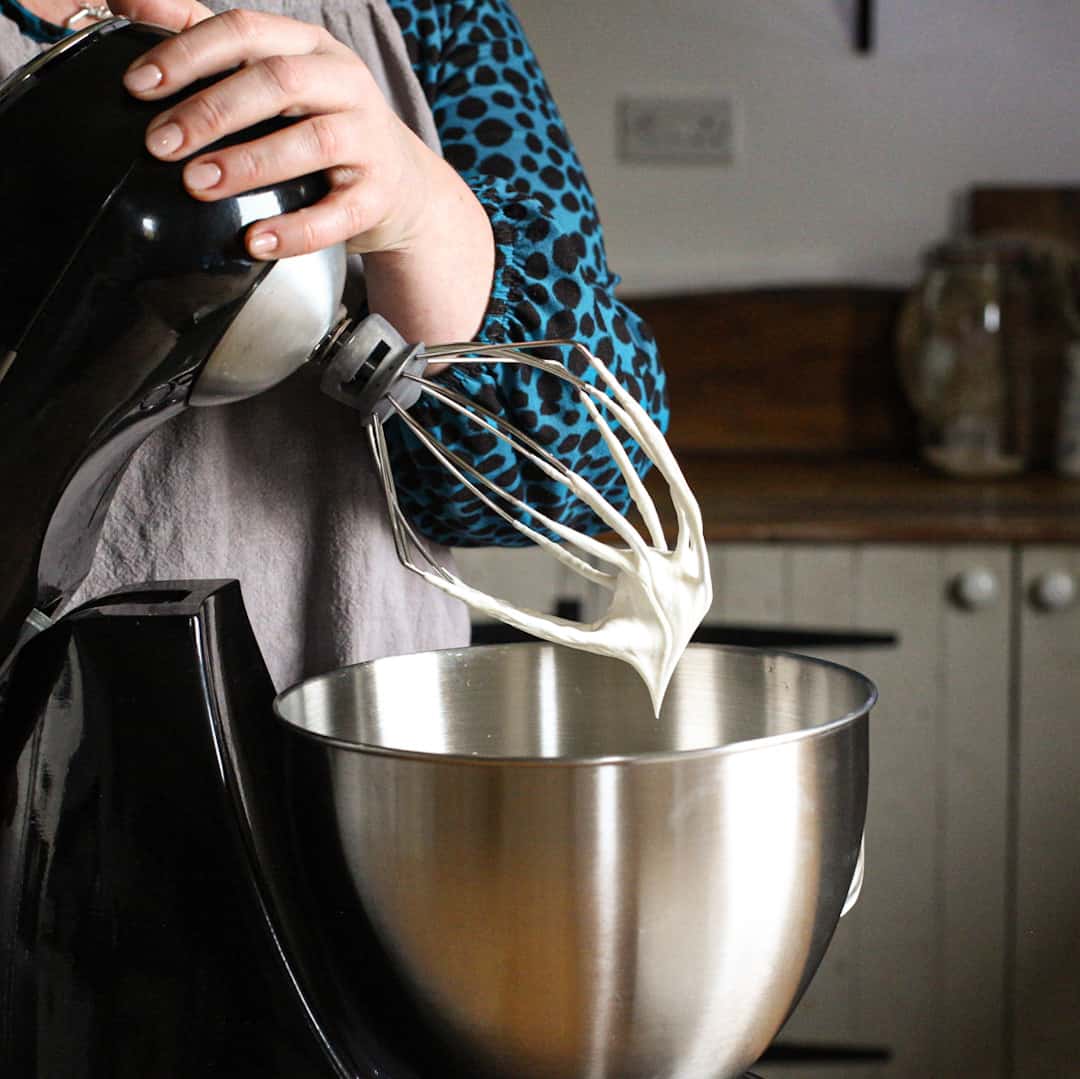
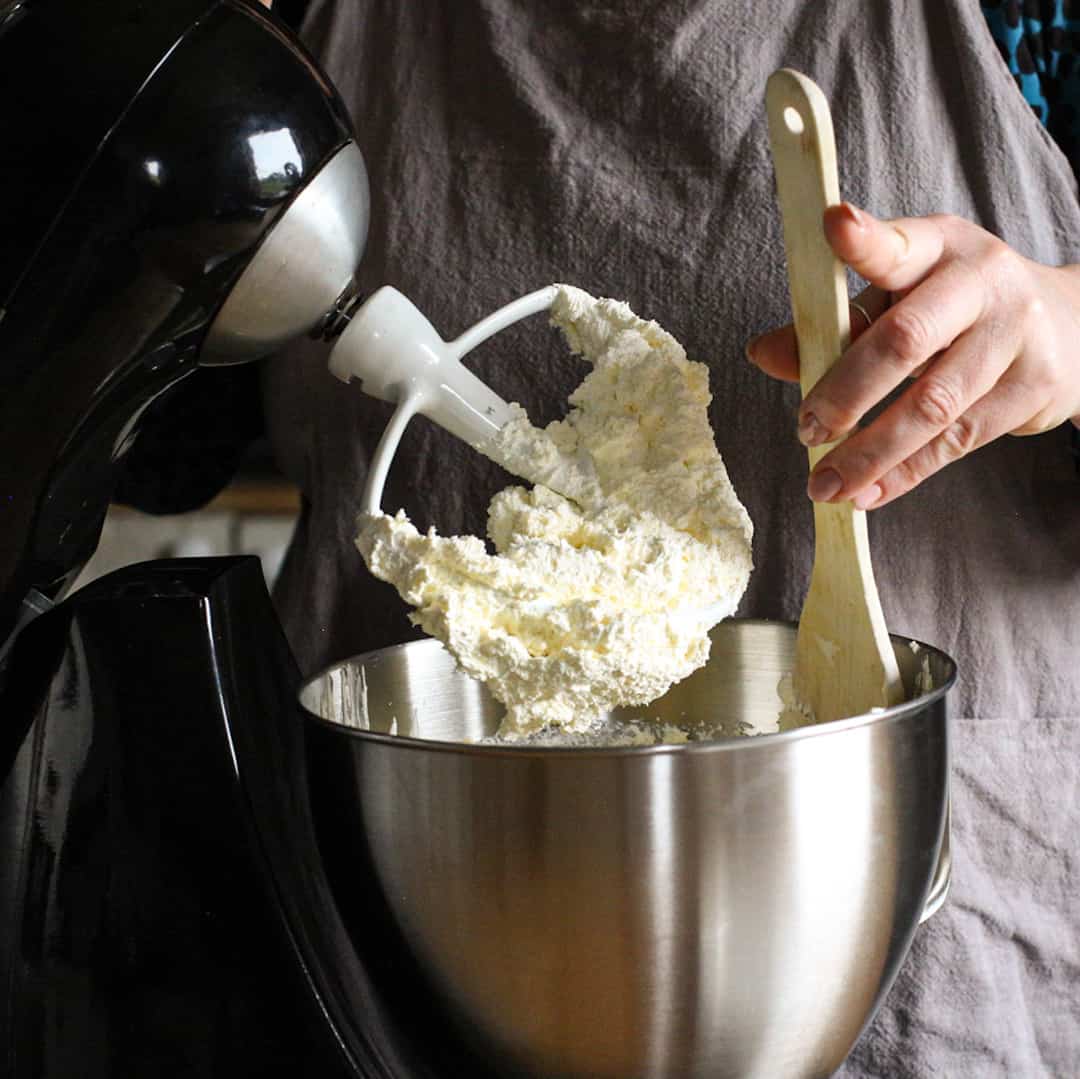
Initially, the cream will whip into beautiful fluffy clouds of whipped cream.
Keep going and it’ll get to this rather ugly stage, where the cream gets clumpy and gritty looking.
Stop every now and then to scrape down the sides of the bowl, and keep going.
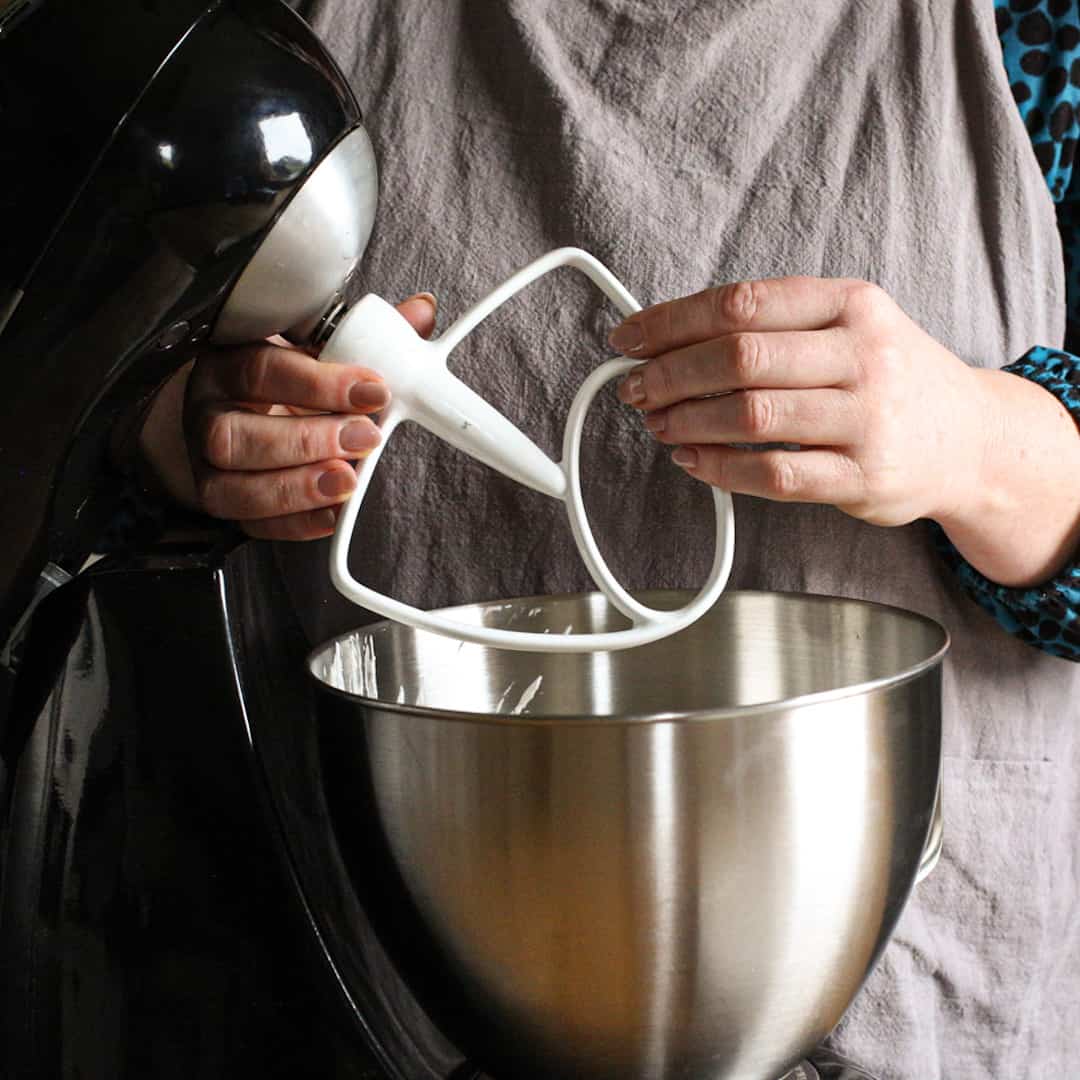
3/ remove the butter
When the mixer starts thumping the butter round the bowl, you know you’re ready!
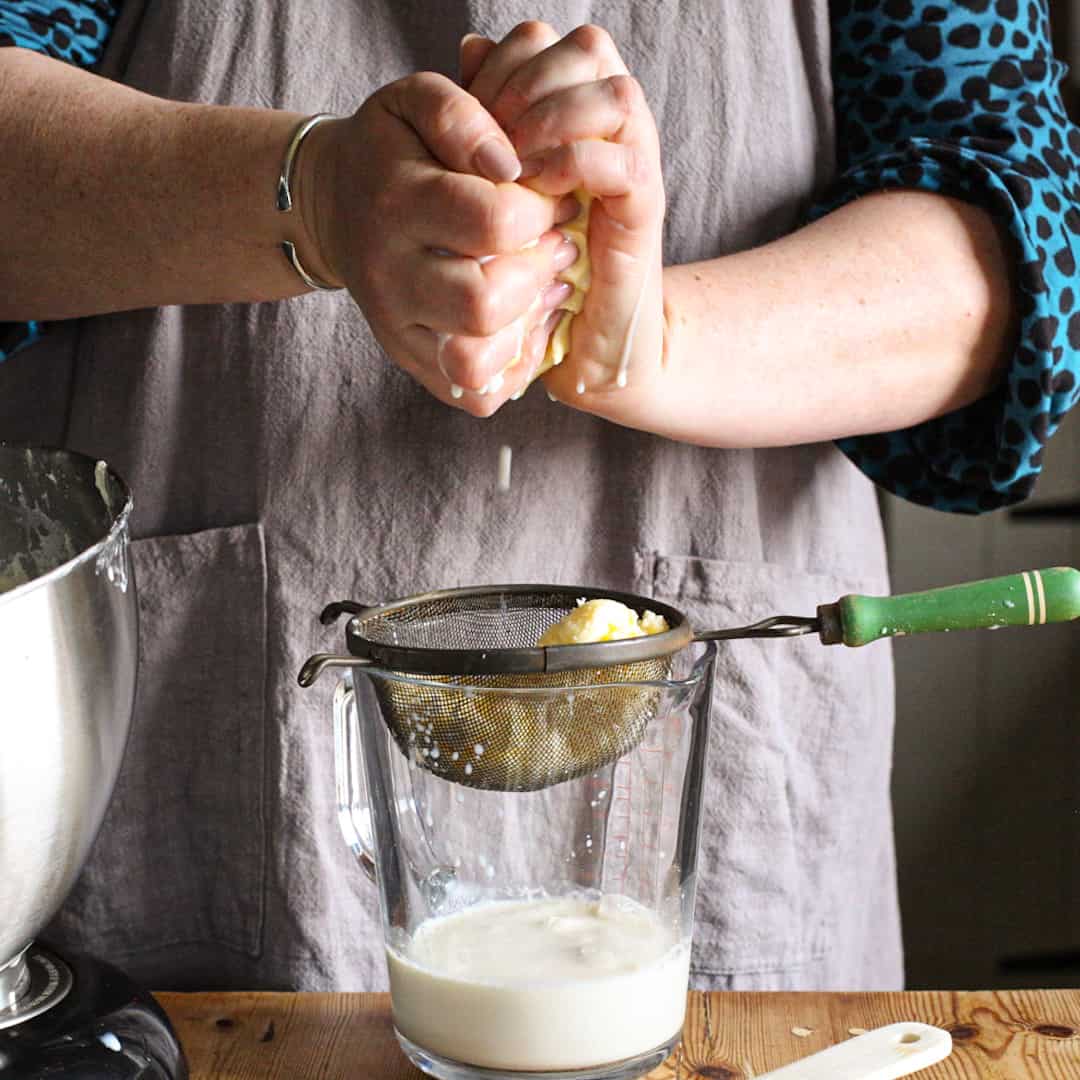
Remove the dough hook or whisk attachment, and holding it over a sieve balanced over a bowl, scrape all the butter into one big ball.
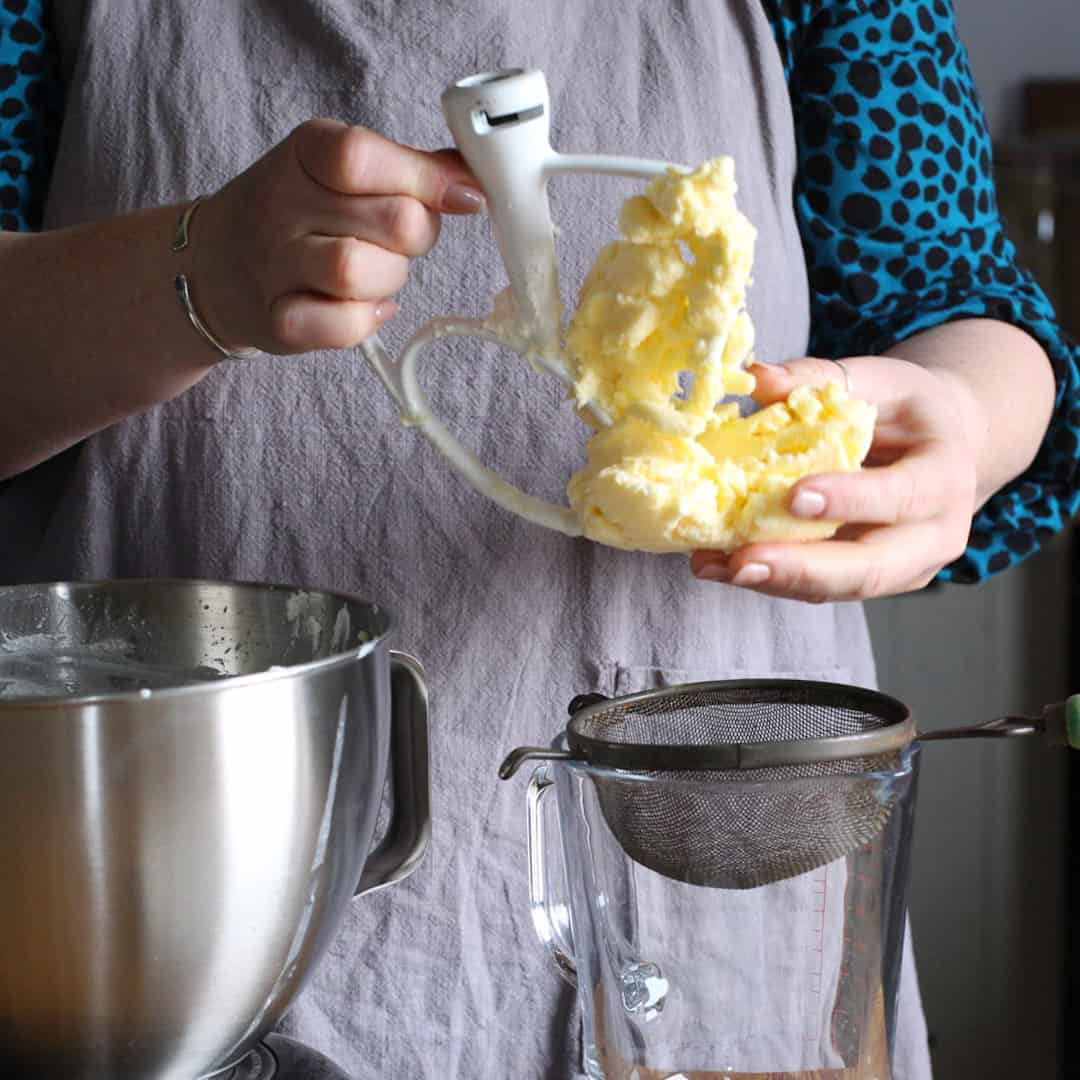
Pour the watery buttermilk that’s in the bowl through the sieve to catch any smaller clumps of butter too.
4/ strain the buttermilk
Remember how buttermilk is the watery part of milk?
If this isn’t removed from your butter, the butter will spoil really quickly.
Pure butter, with the buttermilk removed, has a much longer shelf (fridge!) life.
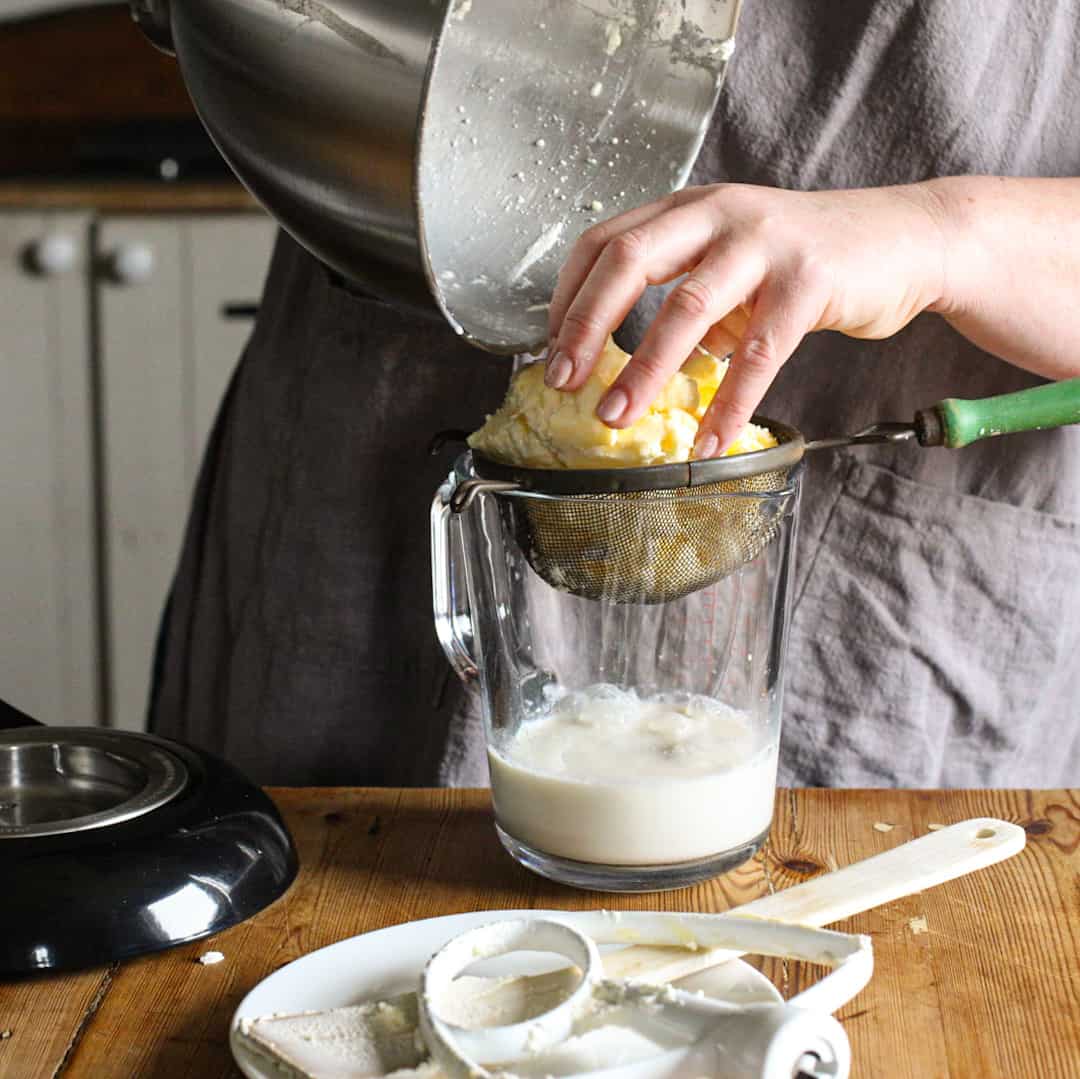
Hold the ball of butter between your hands and SQUEEZE. This part promises to give you quite an upper arm workout!
The jug of buttermilk can be stored in the fridge for a couple of days.
Take a peek at this article if you need some ideas on how to use it up.
Quick note: I’m lactose intolerant so I don’t consume the buttermilk as that’s where the milks sugars (lactose) are found.
Thankfully, as I love butter so much, there are only trace amounts of lactose left in butter once all the buttermilk has been removed. Hoorah!
5/ wash the butter
Next up we need to remove the last traces of buttermilk.
To do this, rinse your mixer bowl out under the cold tap. (It doesn’t need to be clean clean, you’re just rinsing out any extra buttermilk).
Place the lump of butter back into the bowl and pour over some ice cold water.

Now get your hands in the bowl too, and squish the lump of butter between your hands and through your fingers.
The cold will help the butter stay solid and not become greasy from the heat of your hands. And the water will help leach the last drops of buttermilk out.
As I’m writing this I’m wondering how people with Raynaud’s disease (a painful condition of the hands that is triggered by cold) could safely do this step. I wonder if putting the butter and ice water back into the mixer with the dough hook would work. If you give this a go, please let us know in the comments below if it works for you.
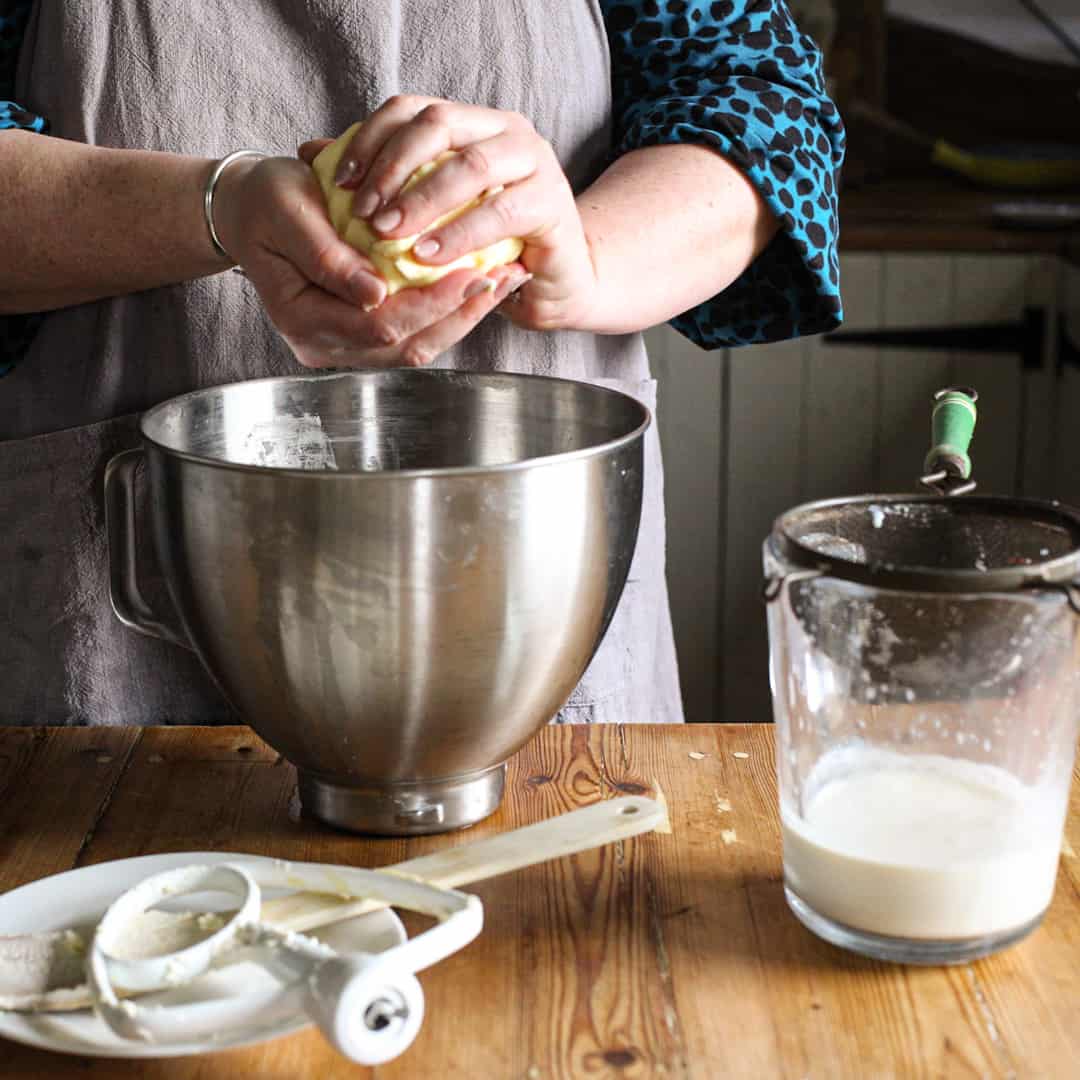
Finally, pick up the ball of butter again and give it a final squeeze.
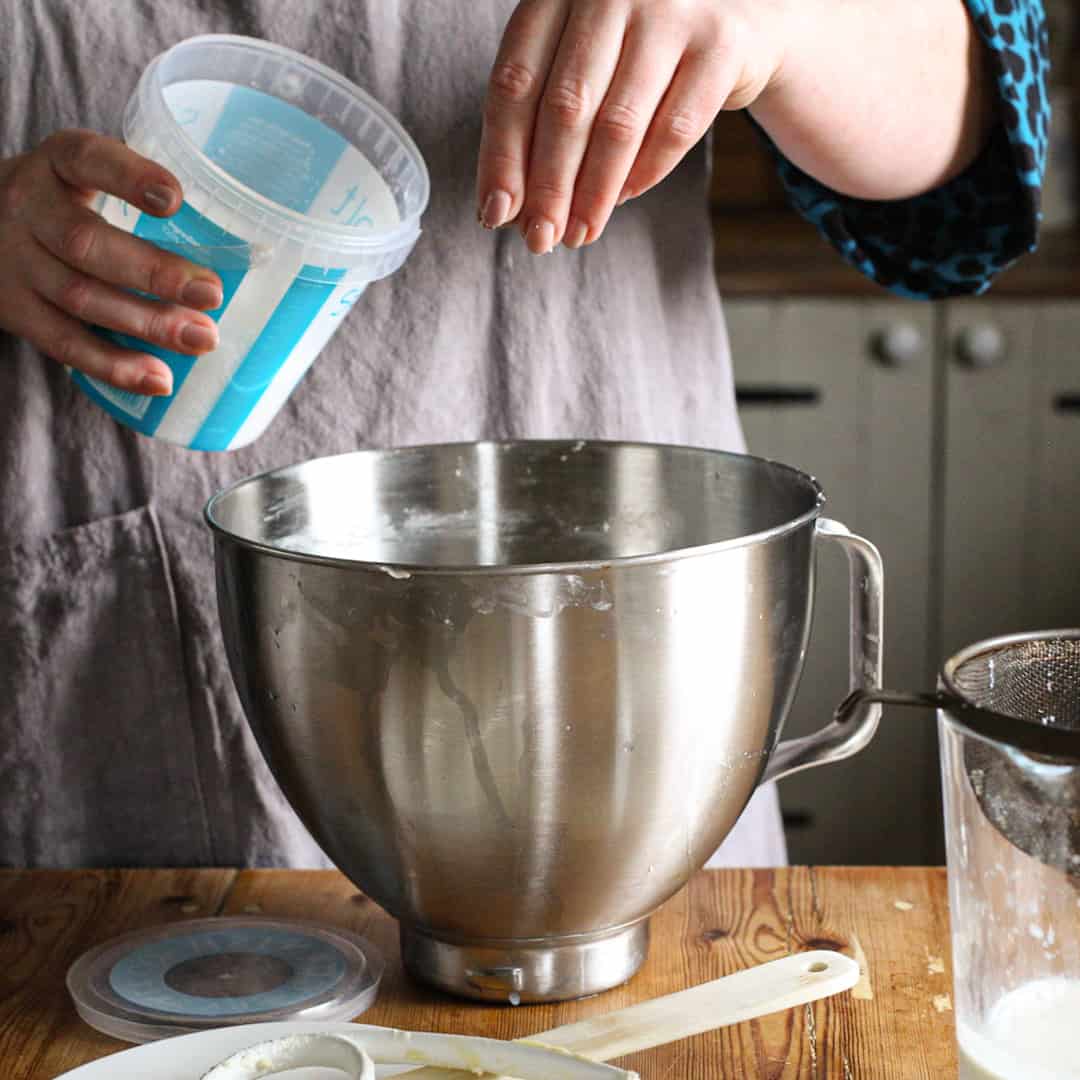
6/ how to make salted butter (optional)
If you prefer your butter salted, then this is the point you can add it. If you’re not sure, salted butter tastes much nicer spread on toast (in my opinion, of course). However if you’re a keen cake baker you may prefer to make an unsalted butter.
Put the butter into a clean bowl, sprinkle over the salt, and mash it in with a fork or potato masher (or use the dough hook again).
Aim to get the salt evenly distributed throughout the butter.
7/ pack the butter
Now you’re ready to package up the butter however you like.
You can press it into a bowl, shape it into a traditional block shape using a couple of spatulas, or roll it into a sausage shape with baking paper.

However you choose to store or serve your butter, make sure it’s covered if it’ll be in the fridge for any amount of time.
Assuming all the buttermilk was removed, and it is stored in an air tight wrapper of some sort, it will last in the fridge for weeks.
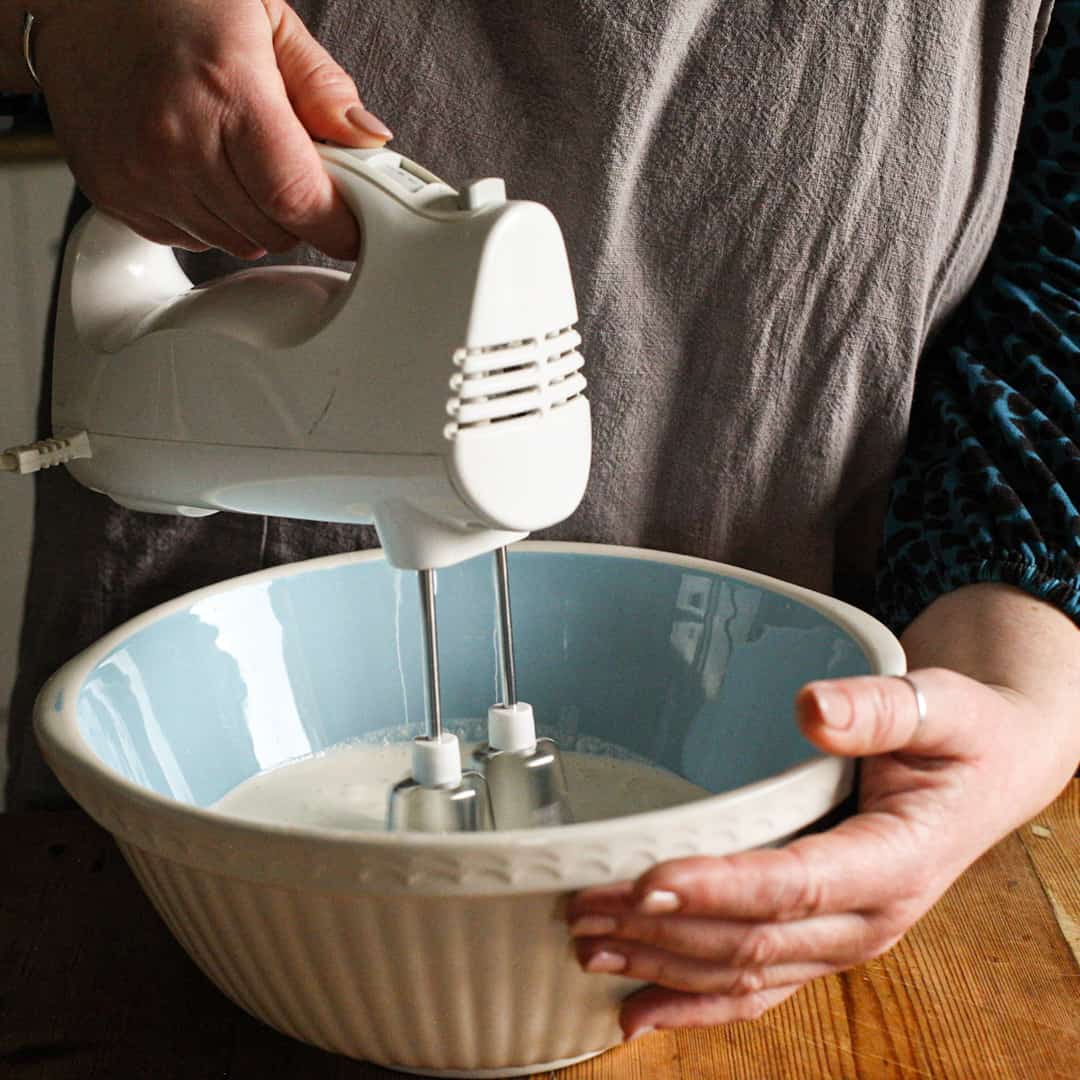
How to make butter with a hand whisk
To make butter with an electric hand held whisk couldn’t be easier. And if you’re only making a small batch, this will likely create less washing up than using the stand mixer.
All the steps are the same as above, the only difference being that you’ll pour the cream into a large mixing bowl, and use the hand mixer directly in that.
Once you’ve got a lump of butter and a wash of buttermilk, join the main recipe above at step 4.
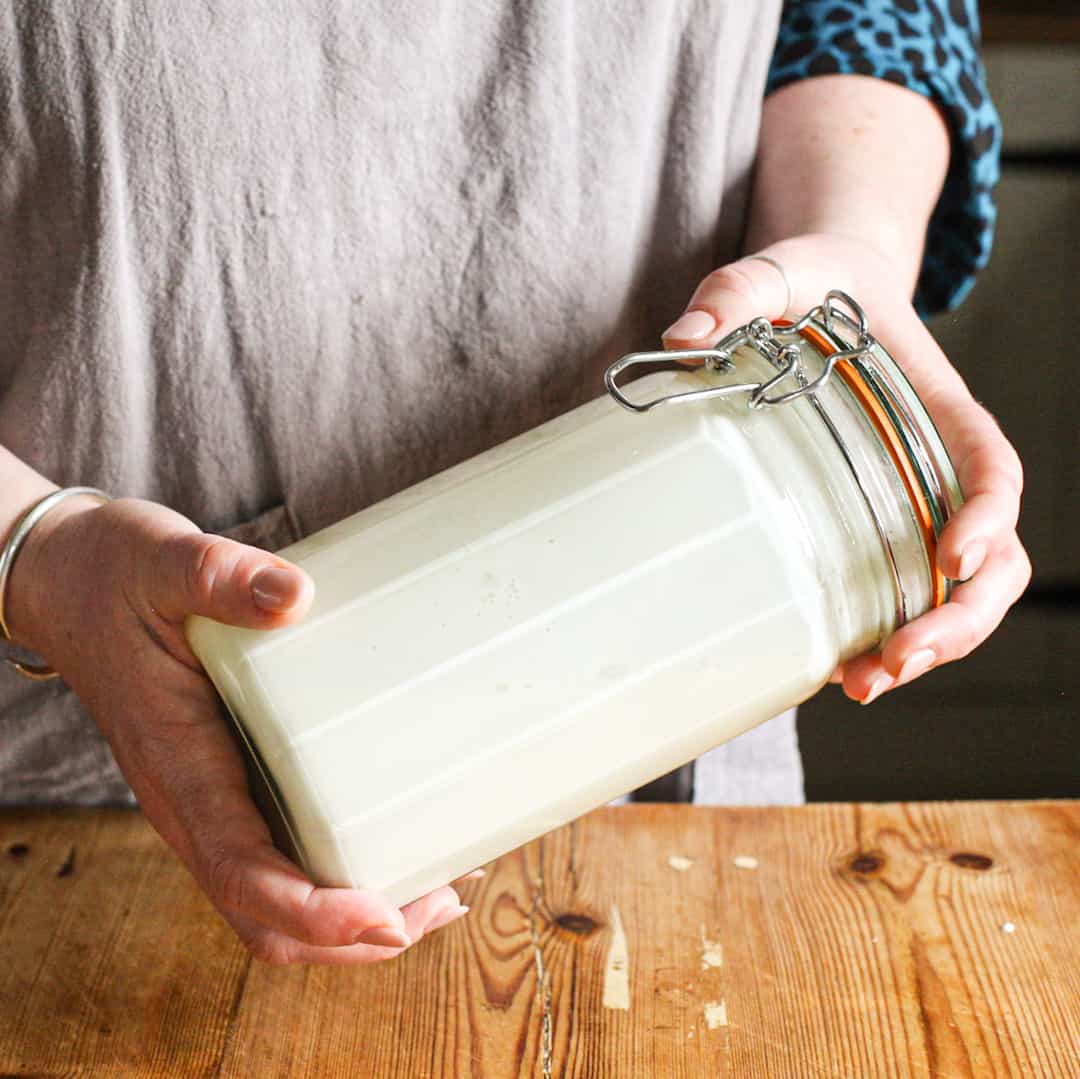
How to make butter in a jam jar
OK, this option isn’t for the faint hearted as it takes a LOT of effort!
The only equipment you’ll need is a large glass jar with a tight fitting lid. A large Mason jar or Kilner jar would be perfect.

Pour your cream into the jar, seal shut and then shake.
And shake.
And shake a bit more!
You’ll hear when the sloshing sounds changes into a slosh and thump sound – that means that the butter has clumped and it’s ready to clean. Simply pick up the recipe at section 4 above: strain out the liquid, then wash the butter.
Whilst this is hard work, it’s a great science experiment for kids to make their own butter.
And a piece of hot toast will never have tasted so good!
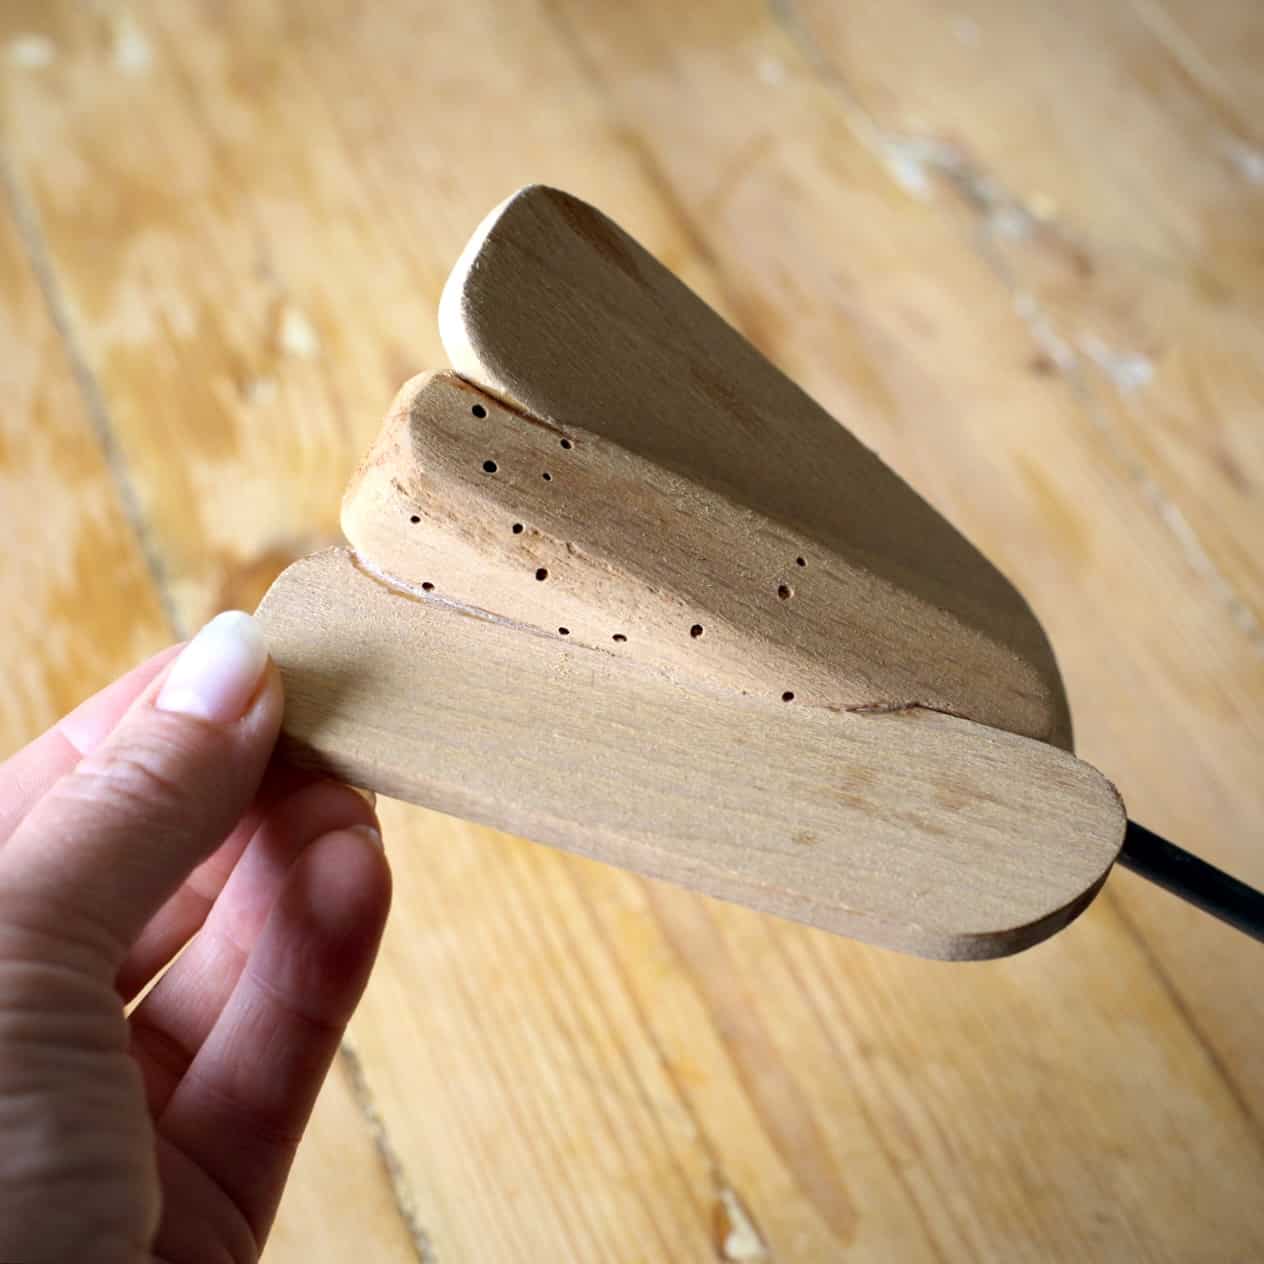
How to make butter in an old fashioned glass butter churn
This is one of the ways that butter would have been made without electricity.
Cream gets poured into the glass jar. Then the handle is turned, which in turn moves the paddles.
It would use a lot less energy than shaking a glass jar for sure! And you could have processed a lot of cream at once.

You must excuse me for not giving an actual demo using this butter churn.
It dates back to the 1940’s, and whilst it still would work perfectly, the wooden paddles are riddled with woodworm.
The little pile of wood dust in the bottom of glass jar lets me know these worm are still alive and well. So this butter churn is just for decor purposes, as no one wants woodworm flavour butter!
Can you freeze homemade butter?
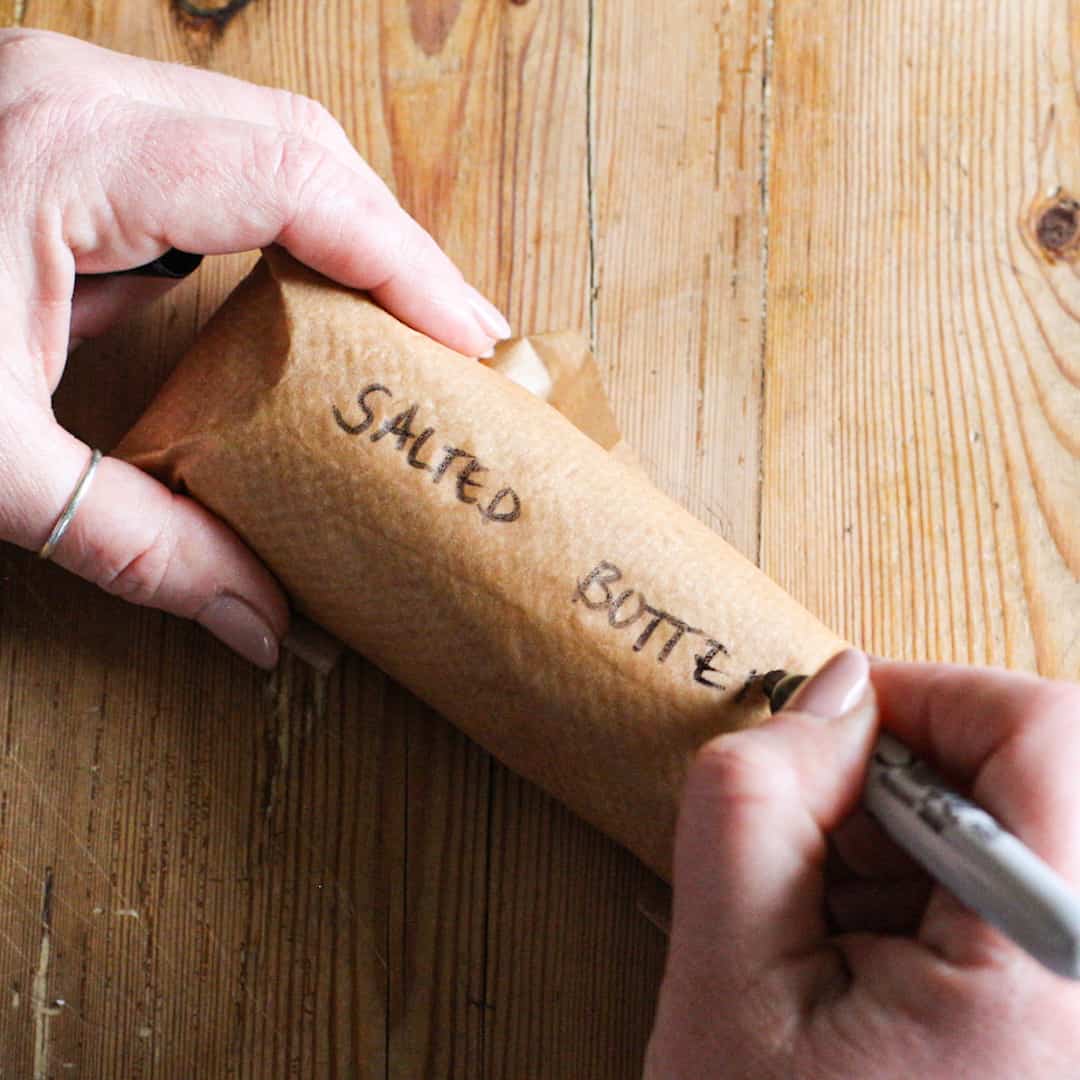
Yes! If you’ve made a big batch you can freeze the excess easily.
Roll your butter in cling film or baking paper and place the rolls into a freezer bag. Write the name and date on each package and place in the freezer.
It will stay perfect for many months and you can defrost a block as needed.
This is a brilliant trick if you find a great sale on cream and want to make it last.
If you decide to give homemade butter a try, please do let me know you get on. And feel free to tag me in any photos you share online, I try to share all that I see. You can find me pretty much everywhere as @hedgecomber.
- 600 ml double cream - also known as heavy cream, or heavy whipping cream
- 3/4 tsp salt
- water - ice cold
Ensure all your equipment is sparkling clean.
Pour the cream into an electric stand mixer bowl, and start beating.
The cream will initially whip into glossy peaks, at this point you can swap the whisk attachment for a dough hook if you like.
Keep whipping and the cream will turn into a lumpy, gritty looking stage. And then, eventually, the cream will split.
At this point you’ll have a thick part that thumps around the mixer bowl, and a white watery part that sloshes round the bowl.
Scrape the buttery lump off the dough hook and place in a sieve balanced over a jug to drain.
Pour the white liquid through the sieve too, to catch any butter remnants still in the bowl.
Using your hands, squeeze the ball of butter to extract more buttermilk. The buttermilk can be stored in the fridge until needed.
Rinse the mixer bowl out under cold water to remove any buttermilk. Place the ball of butter back into the bowl, and pour over the ice cold water.
Again, use your hands to squeeze and squish the butter, releasing the last of the liquid from the fat.
Then remove from the water and squeeze it one final time.
If you wish to salt your butter, place it in a clean bowl.
Sprinkle over the salt and then press it through the butter with a fork or a potato masher. Aim to distribute the salt evenly throughout the butter.
You could try running it back through the stand mixed, ensuring you clean it down properly first. I haven’t tried this so please let me know if it works!)
When you are ready you can package the butter.
Either place it into a bowl and squish down with the back of a dessert spoon if you plan to use it over the next few days.
Or roll into a thick sausage shape and wrap in cling film or baking paper.
Use the latter if you wish to freeze the butter to prevent it getting freezer burnt or have it change in flavour.
PS just because buttermilk is off my lactose free menu, doesn’t mean SassyCat didn’t get to enjoy it!
:)

Jody says
Here from Chris’ link! I’m going to give it a go! Thank you!
Jane Sarchet says
Yay! Hope you enjoyed it Jody :)
Jane x